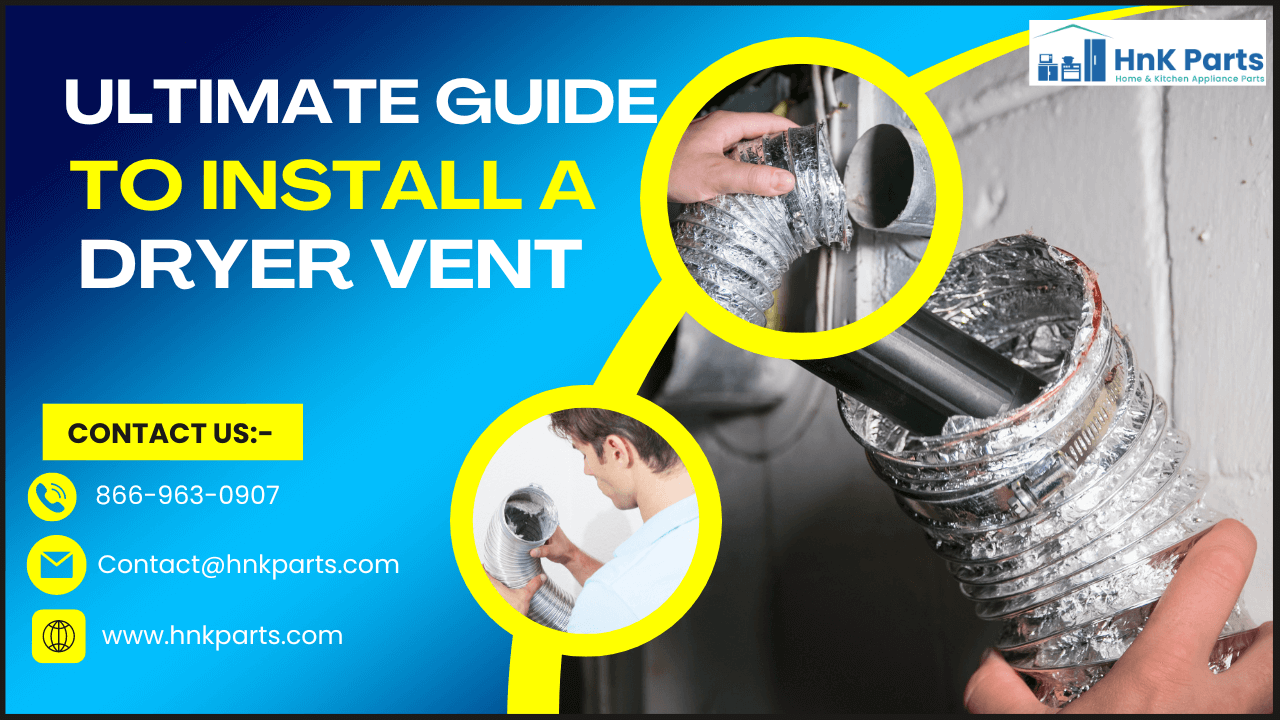
How to Set Up a Dryer Vent: Ultimate Guide
Installing a dryer vent properly is very important to avoid any damages, potential hazards and to obtain the optimum performance of the appliance. While the dryer vent installation may seem like a simple task, overlooking or neglecting this vital step can lead to various issues that may compromise both the appliance's performance and household safety.
Improperly installed dryer vents can pose a significant fire hazard, consume more energy, reduce the lifespan, and sometimes can lead to costly repairs. Additionally improper dryer vent installation results in severe hazards, including fire, carbon monoxide poisoning, reduced efficiency, appliance damage, mold growth, decreased indoor air quality, and property damage. So it is crucial to install a dryer vent properly. Here in this guide we will provide you with detailed steps on how to properly install a dryer vent and some dryer vent maintenance and troubleshooting tips.
Understanding Dryer Vent
Understanding dryer venting is crucial for homeowners to ensure the safe and efficient operation of their clothes dryers. The main purpose of a dryer vent is to expel hot air and moisture generated during the drying process, ensuring the dryer operates effectively and safely.
Components of Dryer Venting System:
- Vent Duct: The vent duct, also known as the dryer hose or vent pipe, is the tubing that connects the back of your dryer to the wall or floor opening leading outside. It can be made of flexible or rigid material, but flexible ducts are more common due to their versatility and ease of installation.
- Vent Hood: The vent hood is located on the exterior of the building and serves as the outlet for the hot air and moisture. It should have a flap or damper that opens when the dryer is in use and closes when it's off to prevent pests and outside elements from entering the vent.
Essential Tools and Materials for Dryer Vent
To properly install and maintain a dryer vent, you'll need the following essential tools and materials:
Tools:
- Screwdriver: For loosening and tightening screws during vent installation.
- Tape Measure: To measure the length of the venting pathway accurately.
- Level: To ensure the venting duct is installed horizontally or at the proper angle.
- Tin Snips or Metal Shears: For cutting and shaping the vent duct if necessary.
- Cordless Drill: To create holes for screws and other fixtures.
- Utility Knife: For cutting and trimming the venting materials.
- Vent Brush or Cleaning Kit: Used for periodic cleaning of the dryer vent to remove lint and debris.
Materials:
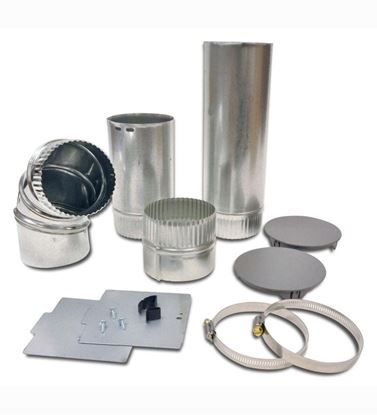
- Vent Duct: Choose a rigid or flexible metal duct of the appropriate size and length to connect the dryer to the exterior vent hood. Rigid ducts are more efficient and less likely to trap lint compared to flexible ones.
- Vent Hood: An exterior vent hood with a flap or louver to prevent pests, debris, and cold air from entering the vent. It should be compatible with the size and type of vent duct you're using.
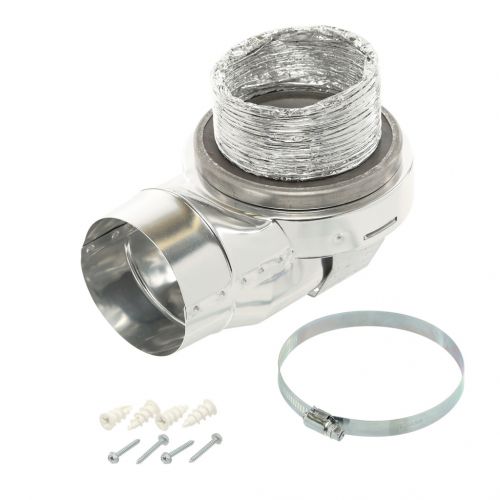
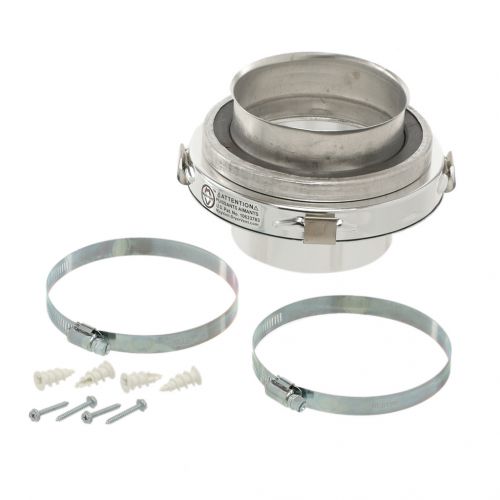
- Vent Clamp: A clamp to secure the connection between the dryer and the vent duct.
- Duct Tape or Metal Foil Tape: To seal and secure joints between duct sections. If using a flexible duct, use only special metal foil tape designed for this purpose, as regular duct tape can deteriorate over time due to the dryer's heat.
- Wall or Floor Flange: If the vent needs to pass through a wall or floor, a flange will help ensure a secure and sealed penetration point.
- Vent Pipe Elbow (optional): If the vent pathway requires a bend, use an adjustable vent pipe elbow to direct the airflow properly.
It's essential to choose high-quality materials and follow safety guidelines while working on the dryer vent installation or maintenance to ensure proper functioning and reduce the risk of fire hazards. If you are not familiar with dryer vent installations, it is recommended to seek professional assistance. Improperly installed dryer vents can be dangerous and lead to potential fire risks.
What Is the Best Dryer Vent Hose to Use?
The best dryer vent hose to use is a rigid metal vent duct. Rigid metal vent ducts are considered the safest and most efficient option for dryer venting due to their durability, fire resistance, and ability to maintain a clear and unobstructed airflow path. Here are the key reasons why rigid metal vent ducts are preferred:
- Fire Resistance: Rigid metal vent ducts, typically made of aluminum or galvanized steel, have a high resistance to fire. In the event of a dryer lint buildup or other issues that could lead to overheating, a metal vent duct is less likely to catch fire compared to other materials.
- Durability: Metal vent ducts are more durable than flexible options. They are less prone to crushing, kinking, or sagging, ensuring a long-lasting and reliable venting system for your dryer.
- Better Airflow: Rigid metal vent ducts have a smooth interior surface, which promotes better airflow and reduces the accumulation of lint. This improves the efficiency of your dryer and reduces the risk of clogs.
- Pest Resistance: Metal vent ducts are less attractive to pests like rodents and birds, reducing the likelihood of infestations in the venting system.
While rigid metal vent ducts are the best option, it's essential to consider the specific requirements and restrictions of your dryer's installation. For example, if your dryer is located in a tight space where rigid ducts cannot be easily installed, you might need to use a flexible metal duct. However, it's crucial to choose a high-quality and UL-listed flexible metal duct designed specifically for dryer venting to ensure safety and performance.
Avoid using plastic or vinyl ducts, as they are highly flammable and can release toxic fumes when exposed to high heat. Additionally, using regular duct tape to connect vent sections is not recommended, as it can deteriorate due to the dryer's heat. Instead, use special metal foil tape designed for this purpose. Consult a professional dryer vent installer or service technician who can assess your setup and recommend the most suitable and safe option.
Dryer Vent Installation in 6 Steps
Here are the steps to install a dryer vent:
1. Locate the Dryer
Position your dryer near an exterior wall where you intend to install the vent. Ensure that there is enough space behind the dryer to accommodate the vent duct without crimping or kinking.
2. Measure and Plan
Measure the distance from the back of the dryer to the exterior wall and add a few inches for flexibility. Plan the route for the vent duct, ensuring it has the shortest and most direct path possible.
3. Cut an Opening: Using a utility knife or appropriate cutting tool, create an opening in the wall or floor at the exit point for the vent hood. Install a wall or floor flange if needed to secure and seal the penetration point.
4. Install the Vent Hood
Attach the vent hood to the exterior wall using screws. Ensure that the hood's flap or louver can move freely and is oriented downward to prevent rainwater and debris from entering.
5. Connect the Vent Duct
Attach one end of the rigid metal vent duct to the dryer's vent outlet using a vent clamp. Use foil tape to secure the connection and prevent any air leaks.
6. Route the Duct to the Vent Hood
Carefully feed the vent duct through the designated pathway you planned earlier. Use a level to ensure that the duct is installed horizontally or with a slight downward slope towards the vent hood. Secure the duct to the wall or floor as needed using appropriate hardware.
By following these steps and guidelines, you can ensure a proper dryer vent installation that promotes the safe and efficient operation of your dryer while protecting your home and family from potential dangers associated with improper venting.
Know more about How to clean a dryer vent.
Dryer Vent Testing and Final Checks
Testing and conducting final checks on your dryer vent installation are crucial to ensure the system is working correctly and safely. Here's a step-by-step guide for dryer vent testing and final checks:
- Vent Connection Inspection: Verify that all connections, including the one between the dryer and the vent duct, are secure and properly sealed with metal foil tape or clamps. Ensure there are no gaps or leaks that could lead to air or lint escaping.
- Vent Pathway Inspection: Check the entire vent pathway for any obstructions, bends, or kinks that might hinder proper airflow. Ensure the vent duct runs as straight and direct as possible to reduce airflow resistance.
- Lint Trap Inspection: Clean the dryer's lint trap thoroughly and ensure it is correctly installed. A clean lint trap improves the dryer's efficiency and reduces the amount of lint entering the vent system.
- Vent Hood Functionality: Confirm that the vent hood flap or louver is opening correctly when the dryer is running and closing securely when not in use. The flap should move freely and not be obstructed.
- Airflow Test: Turn on the dryer and stand near the exterior vent hood. Feel the airflow to ensure it is strong and steady. Weak airflow could indicate an obstruction or an issue with the venting system.
- Temperature Check: During the first few minutes of operation, check the temperature of the air coming out of the vent hood. It should be warm but not excessively hot. If the air feels too hot, it may indicate a ventilation problem or a clog.
- Lint Inspection: After a few cycles of using the dryer, inspect the area around the dryer and the exterior vent hood for any signs of lint accumulation. If you notice excessive lint, it may indicate that the vent system requires cleaning.
- Periodic Maintenance Reminder: Inform the occupants of the house about the importance of regular maintenance, including cleaning the lint trap after each use and scheduling annual vent system inspections and cleanings.
- Carbon Monoxide and Smoke Detectors: Ensure that carbon monoxide and smoke detectors are installed and working correctly in the laundry area and throughout the house. These detectors provide early warning signs of potential hazards.
Regularly performing these tests and checks will help keep your dryer vent system in good working condition.
Dryer Vent Maintenance and Cleaning tips
Here are some tips for dryer vent maintenance and cleaning:
- Unplug the Dryer: Before performing any maintenance or cleaning, always unplug the dryer from the power source to ensure safety.
- Locate the Vent: Identify the location of the dryer vent exhaust outside your home. It is usually a small flap or grate on an exterior wall or roof.
- Remove Lint Buildup: Use a dryer vent brush or a vacuum cleaner attachment to remove lint and debris from the vent pipe. You can also purchase a dryer vent cleaning kit that includes specialized brushes and rods for this purpose.
- Clean the Vent Hood: Check the vent hood outside and make sure it opens and closes properly. Clear away any obstructions like bird nests or debris that might hinder proper airflow.
- Check for Blockages: During the cleaning process, inspect the vent pipe for any blockages. Clean the lint trap/filter after every load of laundry. This helps prevent lint buildup in the dryer and reduces the risk of clogging the vent.
- Use Shorter Ducts: If possible, use the shortest and straightest venting path from the dryer to the exterior. Longer and convoluted ducts can accumulate more lint and reduce airflow.
- Avoid Plastic or Vinyl Ducts: Use rigid or semi-rigid metal ducts for venting. Plastic or vinyl ducts are more prone to trapping lint and are a fire hazard.
- Minimize Flex Ducts: If you must use flexible ducts, use the shortest length possible and avoid sharp bends to maintain efficient airflow.
- Regularly Inspect Dryer Vent: Periodically check the dryer vent for any signs of damage or wear. Replace any damaged parts promptly.
- Dry Similar Fabrics Together: When doing laundry, try to group similar fabrics together. This will help reduce drying time and the amount of lint generated.
By following these dryer vent maintenance and cleaning tips, you can ensure your dryer operates efficiently, extends its lifespan, and reduces the risk of fire hazards associated with lint buildup.
Know about 7 Expert tip & tricks for Effective laundry.
Dryer Vent Troubleshooting Common Issues
Here we have mentioned some common issues with dryer vents and troubleshooting tips:
- Long Drying Times: If your clothes are taking longer than usual to dry, it could be due to a partially blocked or clogged vent. Check for lint buildup in the lint trap, vent pipe, and vent hood. Clean or clear any obstructions you find.
- Overheating Dryer: An overheating dryer could be caused by restricted airflow due to a clogged vent. This can be a fire hazard. Check the vent for blockages and ensure proper ventilation.
- Burning Smell: If you notice a burning smell when using the dryer, it's a sign of a potential fire hazard. Immediately stop using the dryer and inspect the vent for any blockages or damage. You may need professional assistance to clean or repair the vent.
- Lint Around the Dryer: If you notice an excessive amount of lint accumulating around the dryer or in the laundry area, it indicates poor venting. Clean the vent pipe thoroughly and check for any leaks or disconnected sections.
- Dryer Shuts Off Prematurely: A blocked vent can cause the dryer to overheat and trip it's safety thermostat, leading to unexpected shutdowns. Check for obstructions and clean the vent as necessary.
- No Airflow at Vent Hood: If there's little to no airflow at the vent hood when the dryer is running, the vent is likely clogged. Disconnect the vent pipe and check for blockages, then clean it thoroughly.
- Vent Hood Flap Doesn't Open: The vent hood flap should open when the dryer is running and close when it's not. If it remains closed or stuck open, clean the vent hood and check for any obstructions that might be hindering its operation.
- Condensation or Moisture Around the Dryer: Excessive moisture around the dryer or on the walls can be a sign of poor venting. Inspect the vent pipe for any leaks or disconnections and address the issue promptly.
- Excess Lint in Clothes: If you find a lot of lint on your clothes after drying, it may be due to a clogged lint trap, vent pipe, or a venting system that is not adequately expelling lint. Clean the lint trap and vent pipe thoroughly.
- Rattling or Vibrating Noise: A loose or improperly installed vent can cause rattling or vibrating noises. Make sure the vent is securely attached and free from obstructions.
If you encounter any persistent issues with your dryer vent or if you're unsure about how to troubleshoot the problems yourself, it's best to seek the help of a qualified dryer vent cleaning service.
Follow our easy steps to install a dryer vent by yourself with the help of mentioned tools and materials. Addition to the installation steps we have also provided you with the maintenance and troubleshooting tips to keep your dryer in good condition. If you need any replacements for your dryer, HnKParts is the best place to buy them. We offer high quality genuine OEM replacement parts for all your kitchen and home appliances.
FAQ’s
What happens if your dryer is not vented outside?
If your dryer is not vented outside, the hot, moist air stays inside your home, causing increased humidity, longer drying times, potential fire hazards, and higher energy consumption. It's crucial to vent the dryer outside to avoid these issues and ensure safe and efficient operation.
Can you install your own dryer vent?
Yes, you can install your own dryer vent. However, it's essential to follow safety guidelines and local building codes. Make sure to use the right materials and tools, and carefully read the manufacturer's instructions for your dryer. If you're unsure or uncomfortable with the fryer vent installation process, it's best to hire a professional to ensure a proper and secure installation.
What is code for a dryer vent?
The code for a dryer vent typically includes requirements for the vent's material, length, termination point, and clearance from combustible materials. The specifics may vary based on local building codes, but in general, the vent should be made of rigid or flexible metal, be as short and straight as possible, terminate outside with a vent cap, and have proper clearances to prevent fire hazards. It's crucial to check your local building codes to ensure compliance and safety when installing a dryer vent.
What is the safest way to vent a dryer?
The safest way to vent a dryer is to use rigid metal ducts or semi-rigid metal ducts. These materials are less likely to sag or become damaged, providing a smooth and unobstructed airflow for the hot, moist air to escape. The vent should be as short and straight as possible to reduce the risk of lint buildup, which can lead to fire hazards. It should also terminate outside with a proper vent cap to prevent pests or debris from entering and to ensure the expelled air is directed away from the house. Regularly cleaning the lint trap and inspecting the vent for any blockages or damage further enhances safety and efficiency.
What is the best pipe for a dryer vent?
The best pipe for a dryer vent is a rigid metal duct or semi-rigid metal duct. These materials provide a smooth and durable airflow path for the hot, moist air to escape from the dryer. They are less likely to sag or become damaged compared to flexible plastic or foil ducts, which can lead to lint buildup and potential fire hazards. Using rigid metal or semi-rigid metal ducts helps ensure efficient and safe dryer ventilation.
Can a dryer vent go straight up?
Yes, a dryer vent can go straight up, but it is essential to follow safety guidelines and building codes. When venting a dryer vertically, use rigid metal ducts or semi-rigid metal ducts to maintain a smooth airflow path. Ensure the vent is as short and straight as possible to minimize the risk of lint buildup, which can lead to fire hazards. Regularly inspect and clean the vent to prevent blockages and maintain safe and efficient dryer operation.
-
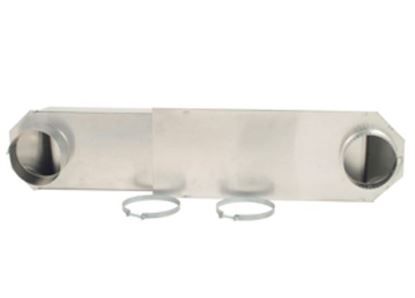
 Whirlpool W10323246 Dryer 4-Way Vent KitSpecial Price $58.81 Regular Price $75.59
 -
 Whirlpool 4396011RP Dryer Telescoping Vent Periscope KitSpecial Price $29.03 Regular Price $45.88
 -
 Any Way Dryer Vent Path For Grindmaster Cecilware Part# Mv-FlexSpecial Price $60.07 Regular Price $91.31
 -
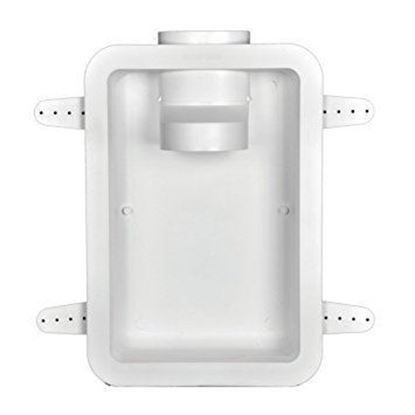 Dundas Jafine Inc. DRB4XZW Recessed Dryer Vent Box WhiteSpecial Price $40.69 Regular Price $52.03