How to Replace a Dryer Motor: A Complete Step-by-Step Repair Guide
A dryer is one of the most important appliances in any home, especially for families with frequent laundry needs. When the dryer motor begins to fail, it can bring the entire drying cycle to a halt. The motor is the heart of the appliance responsible for spinning the drum, ensuring airflow, and driving efficient moisture removal. When it stops functioning, the dryer not spinning becomes the most common and frustrating issue.
This guide explains everything homeowners need to know about dryer motor replacement, including the signs of a failing dryer motor, essential safety practices, tools required, and complete drying machine motor replacement steps. Whether you’re a DIY enthusiast researching how to replace a dryer motor, or a homeowner determining whether professional service is necessary, this dryer motor repair guide provides clear, actionable instructions.
This guide also provides troubleshooting tips, cost insights, and key answers so you can maintain your dryer properly and keep it running at peak performance.
Understanding Dryer Motor Failure and Key Signs You Need a Replacement
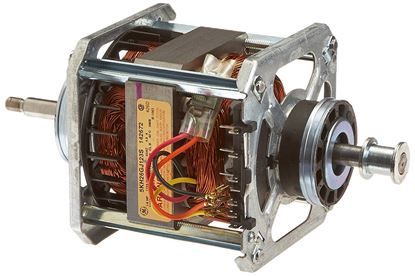
The dryer motor is responsible for rotating the drum and maintaining the steady airflow needed for effective drying. When the motor begins to fail, you’ll notice mechanical or electrical symptoms that often worsen over time. Recognising these signs early can help you avoid sudden breakdowns and higher repair costs.
Common Symptoms of a Bad Dryer Motor
-
Dryer not spinning: When the drum fails to rotate, this strongly suggests that the dryer motor is not working and may need replacement.
-
Loud humming or grinding noise: A humming sound means the motor is attempting to start but lacks power. Grinding or rattling indicates physical damage inside the motor.
-
Burning smell coming from the dryer: An overheating motor emits a burnt electrical odor. Running the dryer in this condition is dangerous and may cause further damage.
-
Dryer stops mid-cycle: A weak or overheating motor may shut off during operation to prevent electrical overload.
-
Erratic or slow drum rotation: If the drum turns sluggishly or inconsistently, motor bearings may be worn out.
-
Visible signs of overheating around the motor housing: Discoloration, melted insulation, or burnt wiring often signal severe motor failure.
Common Causes of Dryer Motor Burnout
-
Dust buildup is causing overheating
-
Worn-out bearings
-
Faulty internal windings
-
Excessive loads are straining the motor
-
Clogged vents are forcing the motor to work harder
-
Electrical surges damage internal components
If you experience multiple symptoms from the list above, your appliance likely requires a dryer motor replacement. Understanding these early warning signs helps prevent more serious failures, making DIY or professional repair more manageable and cost-effective.
Looking for reliable, high-quality dryer replacement parts? At HnK Parts, we offer a wide range of premium components from trusted brands like Whirlpool, LG, Samsung, GE, and Maytag. Whether you need motors, belts, pulleys, or thermostats, we provide durable, affordable parts to keep your dryer performing at its best.
Safety Precautions and Essential Tools for Dryer Motor Replacement
Replacing a dryer motor involves electrical components, internal wiring, and mechanical assembly. Prioritising safety is crucial before beginning any repair.
Safety Precautions
-
Unplug the dryer completely: Never work on a powered appliance. If it’s a gas dryer, shut off the gas valve as well.
-
Wear protective gloves and safety glasses: The dryer housing contains sharp edges and electrical components.
-
Avoid working in wet or humid conditions: Moisture increases the risk of electrical shock.
-
Label all wires and connectors: This ensures correct reassembly and prevents wiring mistakes.
-
Allow the dryer to cool: Running parts, especially motors, may be hot after use.
Tools You’ll Need
To follow proper dryer motor replacement instructions, gather the following items:
-
Screwdrivers (Phillips and flat-head)
-
Nut driver or socket wrench
-
Needle-nose pliers
-
Vacuum for cleaning motor housing
-
Work gloves
-
Replacement dryer motor
-
Belt tension release tool (varies by model)
-
Multimeter for testing electrical continuity
Having the right tools ensures a smoother process and helps avoid damage during replace dryer motor DIY repair work.
Step-by-Step Process: How to Replace a Dryer Motor Correctly
Replacing a dryer motor can feel challenging, but with the right steps, the process becomes much easier to manage. This guide walks you through exactly how to remove the old motor and correctly replace it with a new one.
Below is a detailed, professional walkthrough of drying machine motor replacement steps.
Step 1: Disconnect Power and Remove the Back or Front Panel
-
Unplug the dryer from the outlet.
-
Remove the screws securing the rear or front panel (depending on your dryer model).
-
Lift the panel off to expose internal components.
-
For front panels, carefully disconnect the door switch wiring harness.
Step 2. Remove the Dryer Drum Belt
-
Locate the idler pulley and motor assembly.
-
Relieve tension on the belt by pressing the idler pulley.
-
Slip the belt off the motor shaft and drum.
-
For convenience, leave the belt attached to the drum until the motor is removed.
Step 3. Lift and Remove the Drum
-
Carefully slide the drum forward and out of the dryer housing.
-
Set it aside in a safe area.
-
This exposes the full motor assembly and blower wheel.
Step 4. Remove the Blower Wheel and Motor Housing
-
The blower wheel is typically attached to the motor shaft.
-
Use pliers or a wrench to loosen the clamp.
-
Remove the blower wheel completely.
-
Unscrew the motor mounting brackets or clips.
Step 5. Disconnect Wiring and Lift Out the Motor
-
Label each wire using masking tape for easy reinstallation.
-
Carefully disconnect the motor harness.
-
Lift the faulty motor out of its housing.
-
Inspect surrounding components for signs of damage or burnt wiring.
Step 6. Install the New Dryer Motor
-
Position the new motor into the housing.
-
Reattach the mounting brackets or clips securely.
-
Reinstall the blower wheel and tighten the connection.
-
Connect the wiring harness exactly as labeled.
-
Ensure the motor shaft spins smoothly and freely.
Step 7. Reinstall the Drum and Belt
-
Slide the drum back into place.
-
Loop the belt around the drum.
-
Guide the belt around the idler pulley and motor pulley using the correct diagram or your previous notes.
-
The belt should sit snugly with proper tension.
Step 8. Reattach the Access Panels
-
Reconnect the door switch harness (if front panel model).
-
Secure the rear or front panel using the original screws.
-
Ensure all edges are aligned and tightened.
Step 9. Power Up the Dryer
-
Plug the dryer into the outlet.
-
Do not run a full load yet—initial testing is needed (covered in the next section).
By following these dryer motor replacement instructions, you ensure a safe and effective repair that restores full function to your appliance.
Explore how to clean a dryer in just 9 easy steps to keep your appliance running safely and efficiently.
How to Test Your Dryer After Motor Replacement and Fix Common Issues
Once your new motor is installed, testing ensures everything works correctly before regular use.
Run a No-Heat Cycle
Select an air-dry or tumble-only setting. Observe:
-
Does the drum spin smoothly?
-
Is the motor quiet?
-
Are there vibrations or unusual noises?
Fix: Ensure drum spins smoothly, motor runs quietly, and no abnormal vibrations occur.
Test with Heat
Switch to a heat cycle:
-
Ensure airflow is strong.
-
Listen for humming or clicking sounds.
-
Confirm the motor maintains steady operation without shutting off.
Fix: Confirm strong airflow, no humming or clicking, and steady motor performance without shutting off.
Check for Common Post-Repair Issues
Possible causes:
-
Belt installed incorrectly
-
Idler pulley misaligned
-
Motor not seated properly
Fix: Reopen housing and realign the belt, idler pulley, and ensure the motor is mounted correctly.
Dryer starts then stops mid-cycle
Causes:
-
Overheating due to lint blockage
-
Faulty thermal fuse
-
Incorrect wiring connection
Fix: Clean vents and lint housing, test the thermal fuse using a multimeter, and secure wiring connectors.
Burning smell after motor replacement
Causes:
-
Belt rubbing
-
Debris around the motor
-
Over-tightened blower wheel
Fix: Remove debris, recheck belt alignment, and slightly loosen the blower wheel.
Proper testing ensures your dryer motor not working, replacing repair was done correctly and keeps your appliance running efficiently.
Dryer Motor Replacement Costs: Parts, Labor, and DIY Value Comparison
Understanding dryer motor replacement cost helps homeowners choose between DIY repair and professional service.
|
Category |
Cost Details |
Price Range |
|
Replacement Dryer Motor (Parts Only) |
Average Price |
$80–$180 |
|
High-End Brand Models |
$180–$260 |
|
|
Universal Motors |
$60–$120 |
|
|
Professional Labour Cost |
Average Technician Cost |
$120–$300 |
|
Total Professional Repair |
$200–$480 |
|
|
DIY Dryer Motor Replacement Cost |
Motor |
$80–$180 |
|
Tools (If Needed) |
$20–$40 |
|
|
Total DIY Cost |
$100–$220 |
DIY repairs typically save 40–60% of the total cost compared to hiring a professional.
DIY is recommended if:
-
You’re comfortable with mechanical tasks
-
You can follow step-by-step instructions
-
The appliance is in otherwise good condition
Professional service is better when:
-
Wiring issues are present
-
The dryer is older than 10–12 years
-
Multiple components are failing simultaneously
Evaluating the costs and the condition of your appliance helps determine whether dryer motor replacement is a worthwhile investment.
Check out: fix faster, dry better: the dryer parts you need to know & understand the essential components that keep your dryer running efficiently.
Conclusion: Ensuring Reliable Dryer Performance and Extending the Lifespan of Your Appliance
Replacing a dryer motor may seem complex, but with the right guidance, tools, and safety measures, it is a manageable task for many homeowners. Understanding the causes of motor failure, identifying the symptoms early, and following detailed instructions prevents costly breakdowns and extends your dryer’s lifespan.
Routine maintenance such as clearing vents, reducing overloading, and inspecting mechanical components helps keep the motor in optimal condition. Whether you choose a DIY approach or professional service, timely dryer motor replacement ensures efficient drying performance and protects your appliance investment for years to come.
FAQs
How much does it cost to replace a dryer motor?
The dryer motor replacement cost typically ranges from $150 to $400, depending on your dryer brand and model. DIY repairs can cost as little as $60–$180 for the part alone.
What causes a dryer motor to burn out?
Common causes include lint buildup, blocked ventilation, overheating, bearing wear, and electrical overloads. Regular cleaning and proper loading can prevent premature burnout.
Is it worth fixing a 7-year-old dryer?
Yes. Most dryers have a 10–13 year lifespan, so repairing a 7-year-old model is often cost-effective, especially if the rest of the machine is in good condition.
What is the life expectancy of a dryer motor?
A typical dryer motor lasts 8 to 12 years with proper maintenance. Cleaning lint filters and ensuring good airflow helps maximize its lifespan.
-
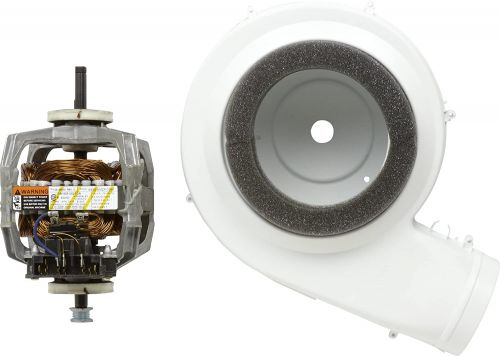 Frigidaire 5303937189 Dryer Motor W/Pulley & Blower HousingSpecial Price $172.98 Regular Price $201.95
 -
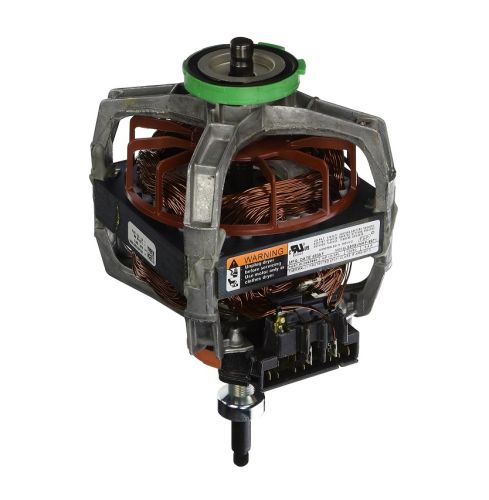 Whirlpool 279811 Dryer Motor DriveSpecial Price $149.60 Regular Price $225.52
 -
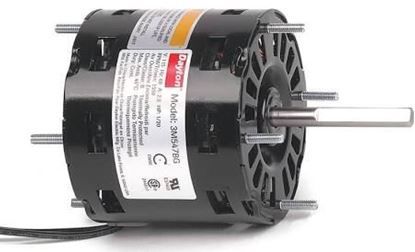 General Electric WE17X22216 Dryer Motor & Pulley KitSpecial Price $179.51 Regular Price $322.85