DIY Dryer Repair: How Replacing a Faulty Thermostat Made Simple
DIY dryer repair is a practical way for homeowners to fix common appliance problems without calling a technician. One frequent issue is a dryer not heating properly or shutting off too soon, which is often caused by a faulty thermostat. Instead of replacing the entire unit, this small component can usually be changed quickly with basic tools and safety precautions.
By learning how to replace the thermostat, you can restore your dryer’s performance in less time and at a lower cost. With the right steps and careful handling, this simple repair can extend the life of your appliance and improve efficiency.
What Is a Dryer Thermostat and Why It Matters
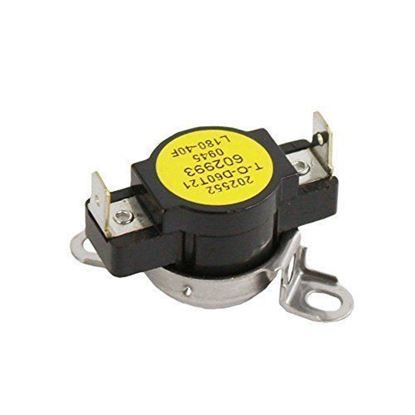
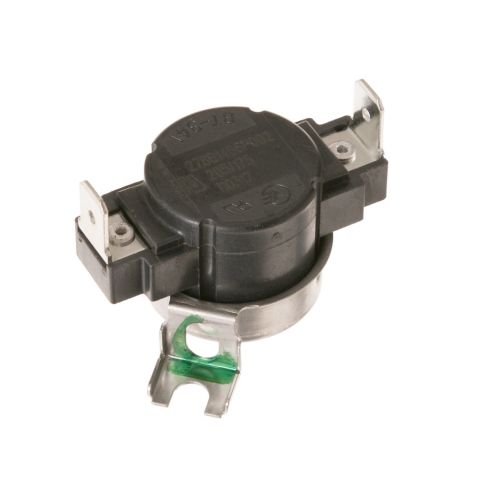
A dryer thermostat is a small but essential component that directly controls the temperature inside your dryer. It plays a key role in regulating heat during each drying cycle, ensuring the appliance operates safely and efficiently without overheating or underperforming.
-
Precise Temperature Control: The thermostat maintains the correct heat level by switching the heating element on and off, ensuring stable drying conditions throughout the cycle.
-
Prevents Overheating: It protects the dryer from excessive heat buildup, which can damage internal parts and increase safety risks during operation.
-
Ensures Proper Drying: A functioning thermostat helps clothes dry evenly and completely, preventing issues like damp spots or overly dry, damaged fabrics.
-
Supports Safety Mechanisms: It acts as a safety control that shuts off heating when temperatures exceed safe limits, reducing fire hazards.
-
Improves Efficiency: By regulating heat accurately, it helps the dryer use energy more efficiently and avoids unnecessary power consumption.
-
Protects Internal Components: It reduces stress on the heating element and other parts, helping prevent frequent breakdowns and costly repairs.
-
Signals Maintenance Needs: When faulty, it often causes irregular heating or cycle interruptions, indicating the need for replacement to restore normal performance.
Looking for home and kitchen appliance replacement parts? Choose HnK Parts for compatible appliance components engineered for durability and performance, from dryers, washers, and ovens to fryers, refrigeration systems, and more. We stock a comprehensive range of parts to meet your repair and maintenance needs.
Key Signs of a Faulty Dryer Thermostat
Early detection of a faulty dryer thermostat helps avoid performance issues and safety risks. Quick dryer thermostat troubleshooting can also reduce repair time and costs. The following highlights common symptoms, causes, and impacts.
|
Symtoms |
Possible Cause |
Impact |
Estimated Occurrence Frequency |
|
Heats initially, then goes cold mid-cycle |
Thermostat thermal drift; opens too early when heated |
Heat stops after 10–20 minutes; continuity fails only when the thermostat is hot |
~20–25% |
|
Works on some cycles but not others |
Faulty thermostat response in different operating modes |
Timed cycle works, but auto/sensor cycle fails despite normal cold test |
~15–20% |
|
Intermittent heating during cycle |
Worn or oxidized internal contacts |
Heat cuts in and out; tapping thermostat briefly restores heating |
~18–22% |
|
Overheats with certain load sizes |
Delayed response due to inconsistent thermal sensing |
Problem appears only with heavy or light loads; temperature spikes noted |
~10–15% |
|
Constant high heat without cycling |
Contacts stuck partially closed |
Drum becomes excessively hot; no temperature cycling observed |
~8–12% |
|
Passes continuity but fails in operation |
Temperature-dependent failure not visible in cold test |
Continuity normal at room temp; failure appears during heating cycle |
~20–30% |
|
Early shutdown with intact thermal fuse |
False high-temperature reading from thermostat |
Thermal fuse tests fine; dryer still shuts off early during operation |
~12–18% |
|
Issue persists after vent cleaning |
Thermostat degraded from previous overheating stress |
Airflow confirmed normal; temperature regulation still unstable |
~15–20% |
Learn how to fix faster, dry better: the dryer parts you need to know, which highlights key dryer components and how they help ensure faster repairs and better performance.
Step-by-Step Process to Replace a Dryer Thermostat
Replacing a dryer thermostat is a simple DIY repair that can restore proper heating and improve performance. With basic tools and the right steps, you can complete this safely at home. Below are the simple steps to replace a dryer thermostat and understand how to replace a dryer thermostat effectively.
Step 1: Disconnect Power Completely
Unplug the dryer from the outlet or turn off the circuit breaker. For gas dryers, also shut off the gas supply. This is a critical safety step in any DIY dryer repair to prevent electrical shock or gas risks.
Step 2: Access the Internal Panel
Depending on your dryer model, remove the rear panel or lower front panel using a screwdriver. This gives you access to the internal components required for proper dryer thermostat troubleshooting.
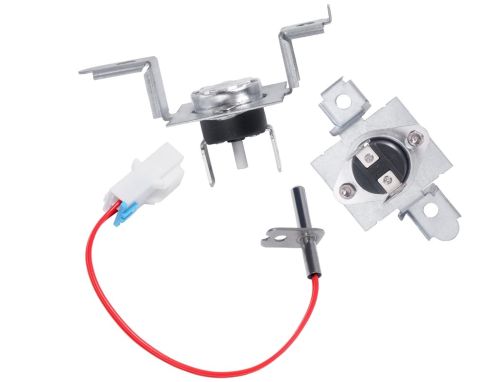
Step 3: Locate the Thermostat Assembly
Identify the thermostat near the heating element or blower housing. It is typically a small component with two connecting wires, essential when learning how to check a dryer thermostat.
Step 4: Test Before Removal (Optional but Recommended)
Use a multimeter to check continuity. If there is no continuity at room temperature, the thermostat is faulty and requires dryer thermostat replacement.
Step 5: Remove and Replace the Thermostat
Carefully disconnect the wires and unscrew the faulty thermostat. Install the new thermostat in the same position, ensuring all wire connections are secure and correctly placed.
Step 6: Reassemble and Perform a Test Run
Reattach the panel, restore power (and gas if applicable), and run a drying cycle. Check if the dryer heats properly and cycles normally, confirming successful dryer thermostat repair.
Preventive Maintenance to Avoid Future Thermostat Failure
Regular dryer maintenance is essential to prevent premature thermostat failure and ensure consistent performance. By following simple preventive steps, you can reduce the need for frequent dryer thermostat repair and extend the lifespan of your appliance.
-
Clean Lint Buildup: Lint accumulation in the filter, vent, or duct restricts airflow and causes overheating. Regularly cleaning dryer lint filters supports proper airflow and prevents stress on the dryer thermostat.
-
Check Ventilation System: Ensure the exhaust vent is clear and unobstructed. Poor ventilation can trap heat inside the dryer, increasing the risk of thermostat malfunction.
-
Avoid Overloading the Dryer: Overloading restricts air circulation and forces the dryer to work harder, leading to uneven heating and potential thermostat issues.
-
Inspect Internal Components: Periodically check parts like the heating element and wiring connections. Early detection of wear can help in timely dryer thermostat troubleshooting.
-
Use Appropriate Heat Settings: Selecting the correct drying temperature for different fabric types prevents excessive heat buildup and protects both the thermostat and your clothes.
Summary: Simplifying Dryer Thermostat Replacement for Reliable Performance
Replacing a dryer thermostat is a simple yet impactful DIY repair that restores proper heating, improves efficiency, and enhances safety. By understanding how it works, identifying early warning signs, and following the correct replacement steps, you can extend your dryer’s lifespan and ensure consistent, reliable performance.
Key Takeaways:
-
A dryer thermostat controls internal temperature to ensure safe and efficient operation.
-
A faulty thermostat can lead to heating problems and reduced dryer efficiency.
-
Identifying early warning signs helps prevent serious damage and costly repairs.
-
Replacing a dryer thermostat is a simple DIY task with basic tools and guidance.
-
Regular maintenance helps maintain consistent performance and extend the dryer's lifespan.
-
Timely repairs reduce safety risks and prevent unnecessary operational costs.
FAQs
Where is the dryer's reset button?
Most dryers don’t have a dedicated reset button. Some models include a reset feature on the thermal overload protector, usually located near the heating element or motor, but many require unplugging the unit or resetting the circuit breaker.
How do I tell if my dryer has a blown thermal fuse?
A blown thermal fuse typically results in the dryer not heating or not running at all. You can confirm this by using a multimeter to check for continuity—no continuity means the fuse needs replacement.
How to do a hard reset on a dryer?
To perform a hard reset, unplug the dryer from the power source or switch off the circuit breaker for 5–10 minutes. Restore power and restart the dryer to see if the issue is resolved.
How to change the sensor on the dryer?
Disconnect power, access the front panel, locate the moisture sensor (usually near the lint filter), remove the mounting screws, disconnect wires, and install the new sensor in the same position.
How to fix the dryer not heating?
Start by checking the power supply, then inspect components like the thermostat, thermal fuse, and heating element. Faulty parts should be tested and replaced as part of proper dryer thermostat troubleshooting and repair.
| Disclaimer: This content is for informational purposes only and is not a substitute for professional appliance repair advice. |
-
 Frigidaire 5308015399 Dryer Safety ThermostatSpecial Price $134.43 Regular Price $147.95
 -
 Frigidaire 131658100 Dryer Heater ThermostatSpecial Price $52.39 Regular Price $63.95
 -
 General Electric WE04X25198 Dryer ThermostatSpecial Price $13.64 Regular Price $17.55
 -
 General Electric WE13X29720 Dryer Door Protect CoverSpecial Price $57.44 Regular Price $78.19
 -
 LG AGM30045804 Dryer Thermistor & Thermostat KitSpecial Price $22.48 Regular Price $44.98