The store will not work correctly in the case when cookies are disabled.
We collect user information to provide a better user experience and protect the security of our website. By continuing to use our website, you acknowledge the use of cookies.
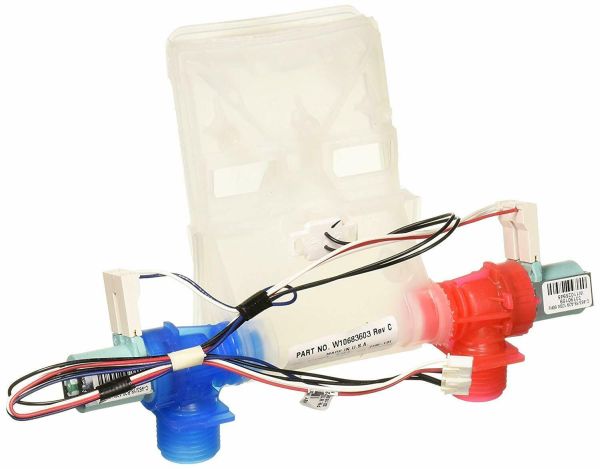
The Whirlpool W11210463 Washer Water Inlet Valve works by controlling the flow of hot and cold water into the washer, ensuring the correct water level for each cycle. When the washer starts, the valve receives electronic signals to open its internal solenoids, allowing water to pass through and fill the tub. Once the required water level is reached, the valve shuts off to prevent overflow. It also regulates the water temperature by mixing hot and cold water as needed for different wash settings. By maintaining a steady and accurate water supply, it ensures proper detergent activation, effective stain removal, and thorough rinsing, resulting in consistently clean clothes with every wash cycle.
Step 1: The power source should be disconnected to avoid the risk of electric shock.
Step 2: The water supply should be shut off by turning the valve on the primary water line.
Step 3: The faucet linked to the valve being replaced should be opened and any leftover water should be allowed to flow out until it is entirely empty.
Step 4: The inlet and outlet pipes should be detached from the existing valve.
Step 5: The valve should be extracted by loosening it from the mounting bracket.
Step 6: The installation area should be cleared prior to placing the new valve to ensure it is free of any debris.
Step 7: The new Whirlpool W11210463 valve should be positioned, ensuring all connections are tightened securely.
Step 8: The water supply should be reactivated to verify there are no leaks.
Step 9: If there are no leaks, the power supply should be reconnected and the valve should be tested to confirm it is functioning correctly.
Step 10: After confirming the valve operates properly, the water supply should be turned off, and the installation of the new valve is finished!
Please remember, these guidelines are served as general advice and should always be used alongside the manufacturer's manual, if accessible.