The store will not work correctly in the case when cookies are disabled.
We collect user information to provide a better user experience and protect the security of our website. By continuing to use our website, you acknowledge the use of cookies.
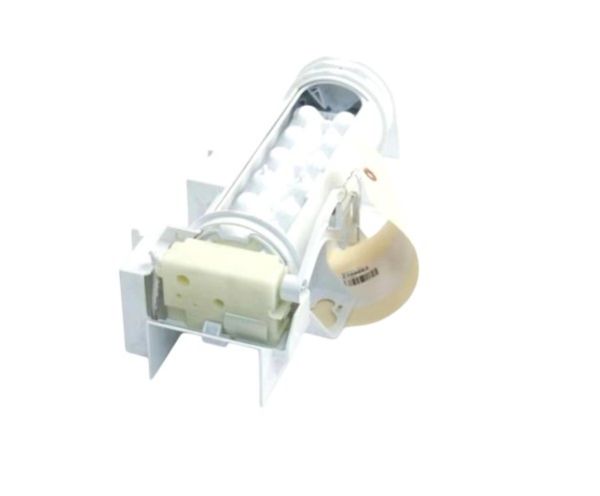
The Bertazzoni Z300063 Refrigerator Ice Maker operates by generating ice cubes on its own from the refrigerator, which is convenient and efficient. This appliance is used to provide crushed ice for beverages, cool food, or any other purpose as required. Its advanced technology makes it easy to produce ice faster cutting on the use of ice trays that are usually handled.
What maintenance is required for the Bertazzoni Z300063 Ice Maker?
Clean the ice maker and bin with mild soap and warm water regularly to prevent buildup and odors. Replace the water filter as recommended to ensure ice quality and proper flow. Inspect for frost accumulation around the fill tube that can block water. Maintain a level refrigerator to support consistent ice production and reduce stress on internal parts.
What are common issues with the Bertazzoni Z300063 Ice Maker?
Ice production stops unexpectedly.
Cubes irregular or small.
Jamming occurs in dispenser.
Water leaks inside compartment.
Installation Steps
Step 1: Assemble the Necessary Tools.
Prior to initiating the repair, it should ensure that all required tools and replacement components are possessed. A Phillips head screwdriver, a flat head screwdriver, needle nose pliers, and the new replacement icemaker for your Bertazzoni refrigerator model Z300063 will be required.
Step 2: Disconnect the Refrigerator.
To avoid any risk of electric shocks or fires, the refrigerator should always be disconnected from the power source before any repairs are undertaken. Once the power cord is unplugged, the rear of the refrigerator should be navigated to find the screws that are holding the icemaker in position.
Step 3: Take Out the Old Ice Maker.
With the Phillips head screwdriver, the screws should be unscrewed and the icemaker should be gently extracted from the refrigerator. After removal, the mounting bracket should be examined to ensure it remains in good shape. The old icemaker should be disposed of.
Step 4: Position the New Ice Maker.
With the mounting bracket still intact, the new icemaker should be aligned with the mounting holes and the screws should be placed. The Phillips head screwdriver should be utilized to secure the screws until the icemaker is firmly attached.
Step 5: Reattach the Power Cord.
The power cord should be reattached and it should be verified that the connections are secure. The refrigerator should be switched back on and allowed to cool before any food is placed inside. The new icemaker can now be checked to ensure it is functioning properly.
Step 6: Conduct Regular Maintenance.
To maintain optimal performance, it is crucial that regular maintenance is carried out on your icemaker. Every two months, the refrigerator should be disconnected and the water supply line should be inspected for any kinks or damage. The condenser coils should be cleaned, the water filter should be replaced, and any signs of wear or damage should be monitored. Adhering to these straightforward steps will assist in keeping your icemaker operational for years to come.
Please remember, these instructions are intended for general guidance and should always be utilized alongside the manufacturer's manual, if available.