The store will not work correctly in the case when cookies are disabled.
We collect user information to provide a better user experience and protect the security of our website. By continuing to use our website, you acknowledge the use of cookies.
Step 1: Unplug and Disconnect the Wine Cooler. The wine cooler should be disconnected from the outlet and ensured that it is entirely separated from any electrical source before proceeding. The screws should be removed from the back of the unit to access the rear panel.
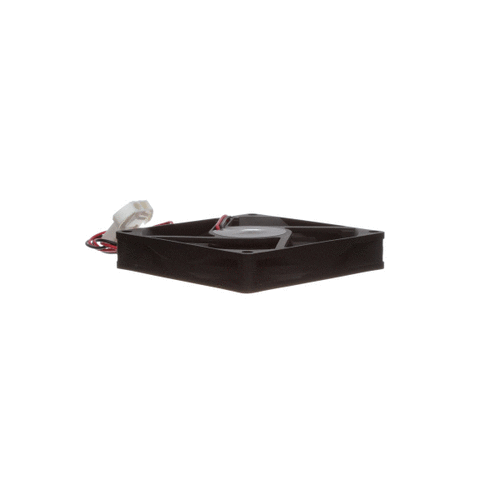
Step 2: Identify the Evaporator Fan. A small fan can be found near the compressor, positioned on the evaporator coil. It should be carefully extracted using needle nose pliers.
Step 3: Clean the Area Surrounding the Fan. A dust rag or cloth should be utilized to tidy up the space around the fan compartment prior to placing the new fan. This will promote optimal fan performance, as dust accumulation may disrupt its operation.
Step 4: Install the New Fan. Your new replacement fan should be taken and delicately positioned within the fan compartment, ensuring the wires are oriented correctly. The fan should be fastened using two screws and the wiring should be reconnected.
Step 5: Reattach the Back Panel. The back panel should be reinstalled and secured with screws. It should be confirmed that the screws are tightened.
Step 6: Plug in the Wine Cooler. Lastly, the wine cooler should be reconnected to the outlet, and you are finished! Your Z-DG7-3 Avanti Products Wine Cooler should now function correctly. Enjoy!
Please remember, these instructions serve as general guidance and should always be utilized alongside the manufacturer's manual, if one is available.