Special Price
$709.59
Regular Price
$1,030.84
In stock
Available Quantity:
70
SKU
WR87X10111
The 
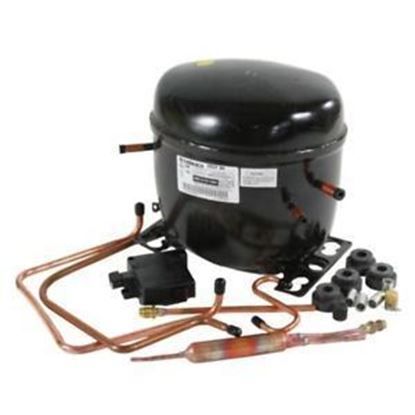
General Electric WR87X10111 Refrigerator Compressor VCC3 operates through the process of compressing refrigerant gas that assists in regulating the temperature inside the fridge. This compressor plays the role of circulating the refrigerant within the system so as to draw heat from inside refrigerator and expel it. The compressor, for instance, is energy efficient hence cutting down electricity usage while at the same time ensuring that the fridge is always chilly hence a long-lasting solution to fridge problems.
Manufacturer
✓ This Product Replaces:
WR87X10064, WR87X10180
This Part Fits the Following Models (866)
GE PGCS1RKZASS Bottom-Mount Refrigerator
GE PGSS5NFYASS Bottom-Mount Refrigerator
GE PGSS5NFXBSS Bottom-Mount Refrigerator
GE PGSS5NFXCSS Bottom-Mount Refrigerator
GE PGSS5NFXASS Refrigerator
GE PGCS1RKZHSS Bottom-Mount Refrigerator
GE PGCS1RKZJSS Bottom-Mount Refrigerator
GE PFSS5PJYCSS Bottom-Mount Refrigerator
GE PFSS5PJZASS Bottom-Mount Refrigerator
GE PFSS5PJYASS Bottom-Mount Refrigerator
GE PFSS5PJXBSS Bottom-Mount Refrigerator
GE PFSS5PJXCSS Bottom-Mount Refrigerator
GE PFSS5PJXASS Bottom-Mount Refrigerator
GE PFSS5NFZCSS Bottom-Mount Refrigerator
GE PFSS5NFZHSS Bottom-Mount Refrigerator
Showing 1-15
of 866
| Manufacturer Name: GENERAL ELECTRIC Product Number: WR87X10111 OEM Part Number: WR87X10111 Product Description: Compressor Vcc3 Repl. Ki |
Choose the best Home Appliance parts and supplies from HnKParts!
Same Day Shipping
Best Quality And Best Price
Wide Range of Inventory
Best Customer Service
Have More Questions or Need Help to Place The Order?
Reach us at (866)723-0907 or [email protected]
Write Your Own Review
Customer Questions
Installation Steps
Step1: Unplug the refrigerator to ensure safety.
Step2: Disconnect the wiring harness and refrigerant lines from the old compressor.
Step3: Remove the old compressor from its mounting bracket.
Step4: Install the new compressor and reconnect wiring and refrigerant lines securely.
Step5: Reassemble panels, restore power, and test for proper operation and cooling.
