
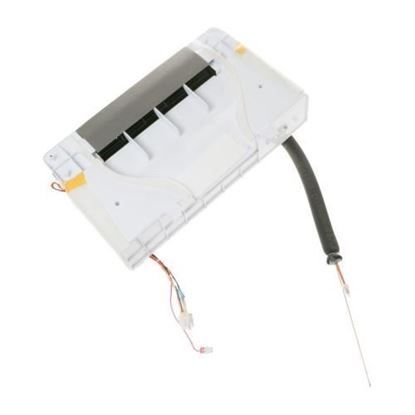
General Electric WR85X10065 Refrigerator Complete Evaporater Assembly FF

Special Price $524.67 Regular Price $713.63
In stock
Available Quantity:   1
SKU
WR85X10065

Product Description

The General Electric WR85X10065 Refrigerator Complete Evaporator Assembly FF maintains temperature through effective air circulation between freezer and refrigerator sections. The evaporator fan operates with its coil and necessary components to achieve optimal cooling performance. The assembly functions by first drawing hot air followed by cooling it down, before returning it for temperature control.
Manufacturer
https://www.hnkparts.com/media/catalog/product/w/r/wr85x10065_general-electric_hnkparts.jpg
Manufacturer Name: GENERAL ELECTRIC
Product Number: WR85X10065
OEM Part Number: WR85X10065
Product Description: Complete Evap Asm Ff

Choose the best Home Appliance parts and supplies from HnKParts!

  • Same Day Shipping

  • Best Quality And Best Price

  • Wide Range of Inventory

  • Best Customer Service

Have More Questions or Need Help to Place The Order?
Reach us at (866)723-0907 or [email protected]

Write Your Own Review
You're reviewing:General Electric WR85X10065 Refrigerator Complete Evaporater Assembly FF
Your Rating
Customer Questions
What maintenance is required for the General Electric WR85X10065 Evaporator Assembly?

Regularly inspect the refrigerator evaporator assembly for frost buildup and debris. Ensure coils are clean and airflow is unobstructed. Check for any unusual noises or leaks, and always disconnect power before servicing to ensure safety.

What are common issues with the General Electric WR85X10065 Evaporator Assembly?

  • Refrigerator frost accumulation on coils.
  • Uneven cooling or temperature fluctuations.
  • Leaks in the evaporator or connections.
  • Unusual humming or rattling noises during operation.

Installation Steps

Step1: Turn off power and unplug refrigerator for safety.

Step2: Remove freezer shelves and rear panel screws to access evaporator assembly.

Step3: Carefully disconnect wiring harnesses, sensors, and evaporator connections without damaging lines.

Step4: Install new assembly, align mounting points, reconnect wiring securely and check seals.

Step5: Reassemble panel, restore power, and run test cycle to confirm proper cooling.
