
$89.78
In stock
Available Quantity:
3
SKU
WR55X41025
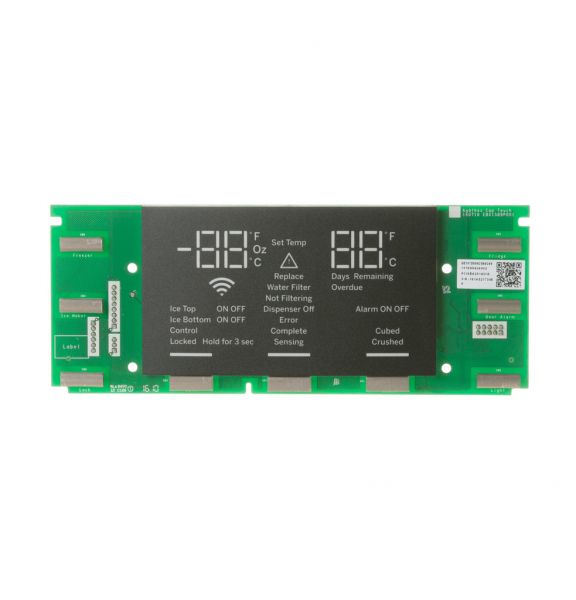
The General Electric WR55X41025 Dispenser Board controls the dispensing mechanisms of a refrigerator to facilitate the proper working of the water and ice dispenser receives signals from the control panel and switches on the parts required to dispense either ice or water and also controls the flow of power and communication between the dispenser and internal mechanisms, making it accurate and dependable. Changing the faulty dispenser board enables it to work properly without having to face problems such as non-functional buttons or improper dispensing.
Manufacturer

This Part Fits the Following Models (50)
GENERAL ELECTRIC GFS26GMNBES REFRIGERATOR
GENERAL ELECTRIC DFE28JGHFBB REFRIGERATOR
GENERAL ELECTRIC DFE28JGHCBB REFRIGERATOR
GENERAL ELECTRIC DFE28JGHCWW REFRIGERATOR
GENERAL ELECTRIC DFE28JMHDES REFRIGERATOR
GENERAL ELECTRIC DFE28JGHEBB REFRIGERATOR
GENERAL ELECTRIC DFE28JSHDSS REFRIGERATOR
GENERAL ELECTRIC DFE28JGHDWW REFRIGERATOR
GENERAL ELECTRIC DFE28JGHEWW REFRIGERATOR
GENERAL ELECTRIC DFE28JMHEES REFRIGERATOR
GENERAL ELECTRIC DFE28JSHBSS REFRIGERATOR
GENERAL ELECTRIC DFE28JSHESS REFRIGERATOR
GENERAL ELECTRIC DFE28JSHFSS REFRIGERATOR
GENERAL ELECTRIC DFE28JGHDBB REFRIGERATOR
GENERAL ELECTRIC DFE28JGHBBB REFRIGERATOR
Showing 1-15
of 50
| MANUFACTURER NAME: GENERAL ELECTRIC PRODUCT NUMBER: WR55X41025 OEM PART NUMBER: WR55X41025 PRODUCT DESCRIPTION: SWS:PCB ASM LED ICON UI |
CHOOSE THE BEST HOME APPLIANCE PARTS AND SUPPLIES FROM HNKPARTS!
SAME DAY SHIPPING
BEST QUALITY AND BEST PRICE
WIDE RANGE OF INVENTORY
BEST CUSTOMER SERVICE
HAVE MORE QUESTIONS OR NEED HELP TO PLACE THE ORDER?
REACH US AT (866)723-0907 OR [email protected]
Write Your Own Review
Customer Questions
Installation Steps
Step1: Disconnect refrigerator power supply and unplug unit before starting.
Step2: Remove dispenser cover panel screws carefully.
Step3: Carefully unplug old control board connectors avoiding moisture.
Step4: Install new board aligning connectors properly.
Step5: Secure board and reassemble panel tightly.
Step6: Restore power and test dispenser display functions fully.
Step7: Ensure no loose connections before restoring power safely.
