
Special Price
$227.88
Regular Price
$270.69
In stock
Available Quantity:
65
SKU
WR55X11064
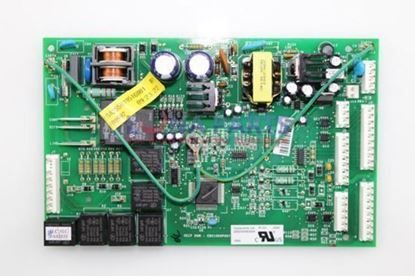
The General Electric WR55X11064 Combined HMI Main Board used to manages and regulates different operations of the refrigerator to enhance its performance. This electronic control board regulates temperature, defrosting, and user input and output, making it easy to operate. By integrating the key functions, it optimize energy usage and the durability of the appliance is also improved. A properly functioning control board helps in maintaining the efficiency of the refrigerator and the management of the system and is an important component of refrigerator maintenance.
Manufacturer

✓ This Product Replaces:
WR55X11024
This Part Fits the Following Models (88)
GE CFCP1NIZESS Bottom-Mount Refrigerator
GE CFCP1NIZASS Bottom-Mount Refrigerator
GE CFCP1NIZCSS Bottom-Mount Refrigerator
GE CFCP1NIZBSS Bottom-Mount Refrigerator
GE PFCS1PJZASS Bottom-Mount Refrigerator
GE PFCS1PJZDSS Bottom-Mount Refrigerator
GE PFCS1PJZHSS Bottom-Mount Refrigerator
GE PFCS1PJZCSS Bottom-Mount Refrigerator
GE PFCS1PJZBSS Bottom-Mount Refrigerator
GE PDCS1NCZALSS Bottom-Mount Refrigerator
GE PDCS1NCZHLSS Bottom-Mount Refrigerator
GE PDCS1NCZHRSS Bottom-Mount Refrigerator
GE PGSS5PJZASS Bottom-Mount Refrigerator
GE PGSS5PJZCSS Bottom-Mount Refrigerator
GE PFCF1PJZABB Bottom-Mount Refrigerator
Showing 1-15
of 88
| Manufacturer Name: GENERAL ELECTRIC Product Number: WR55X11064 OEM Part Number: WR55X11064 Product Description: Board Main Combined Hmi |
Choose the best Home Appliance parts and supplies from HnKParts!
Same Day Shipping
Best Quality And Best Price
Wide Range of Inventory
Best Customer Service
Have More Questions or Need Help to Place The Order?
Reach us at (866)723-0907 or [email protected]
Write Your Own Review
Customer Questions
Installation Steps
Step1: Unplug the refrigerator to ensure safety before starting.
Step2: Open the control panel to access the existing HMI main board.
Step3: Disconnect all wiring connectors carefully from the old board.
Step4: Remove mounting screws and take out the old board.
Step5: Install the new main board and secure it with screws.
Step6: Reconnect all wires, close the panel, restore power, and test operation.
