Special Price
$108.64
Regular Price
$123.95
In stock
Available Quantity:
47
SKU
WR32X10697
The 
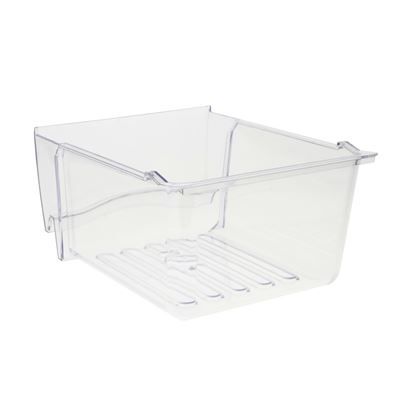
General Electric WR32X10697 Refrigerator Crisper Drawer helps maintain optimal humidity levels to keep fruits and vegetables fresh for longer. It slides smoothly within the refrigerator, creating a controlled environment that reduces moisture loss. The durable, clear design allows easy visibility while ensuring proper air circulation for consistent cooling. This replacement part restores efficiency by preventing premature spoilage and maintaining food quality. Its sturdy construction enhances durability, while the precise fit ensures hassle-free installation for seamless refrigerator operation.
Manufacturer
This Part Fits the Following Models (56)
GE GDSC0KBXARBB Bottom-Mount Refrigerator
GE GDSC0KBXARCC Bottom-Mount Refrigerator
GE GDSC0KBXARWW Bottom-Mount Refrigerator
GE GDSC0KBXCRBB Bottom-Mount Refrigerator
GE GDSC0KBXCRCC Bottom-Mount Refrigerator
GE GBSL0HCXCLLS Bottom-Mount Refrigerator
GE GBSL0HCXCRLS Bottom-Mount Refrigerator
GE GBSL0HCXELLS Bottom-Mount Refrigerator
GE GBSL0HCXERLS Bottom-Mount Refrigerator
GE GBSL0HCXFLLS Bottom-Mount Refrigerator
GE GBSL0HCXFRLS Bottom-Mount Refrigerator
GE GDSC0KBXCRWW Bottom-Mount Refrigerator
GE GDSC0KCXARBB Bottom-Mount Refrigerator
GE GDSC0KCXARCC Bottom-Mount Refrigerator
GE GDSC0KCXARWW Bottom-Mount Refrigerator
Showing 1-15
of 56
| Manufacturer Name: GENERAL ELECTRIC Product Number: WR32X10697 OEM Part Number: WR32X10697 Product Description: Pan Veg |
Choose the best Home Appliance parts and supplies from HnKParts!
Same Day Shipping
Best Quality And Best Price
Wide Range of Inventory
Best Customer Service
Have More Questions or Need Help to Place The Order?
Reach us at (866)723-0907 or [email protected]
Write Your Own Review
Customer Questions
Installation Steps
Step1: Unplug the refrigerator to ensure safety before installation.
Step2: Open the refrigerator door and remove any remaining crisper drawers or contents.
Step3: Align the new crisper drawer with the designated shelf rails.
Step4: Gently slide the drawer into place until it sits securely.
Step5: Ensure smooth sliding movement and proper fit.
Step6: Plug the refrigerator back in and test functionality.
