
Special Price
$116.08
Regular Price
$188.15
In stock
Available Quantity:
158
SKU
WR14X10305
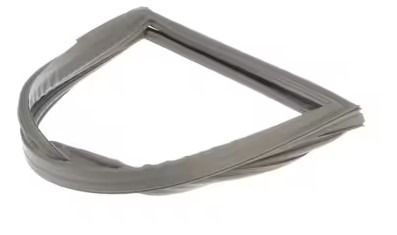
The General Electric WR14X10305 Refrigerator French Door Gasket with Flap helps to minimize the flow of cold air around the door and maintain the desired temperature. It operates through sealing gaps to minimize heat transfer and improve the cooling process. This gasket assists in reducing damage to the appliance, which in turn increases its durability. It is easy to install and enhances the efficiency of the refrigerator by reducing moisture and ensuring that the interior is free from dirt. This makes it more durable in terms of functionality hence improved energy efficiency and better appliance performance.
Manufacturer

This Part Fits the Following Models (87)
GE GFCE1NFBADSS Bottom-Mount Refrigerator
GE PGCS1NFZASS Bottom-Mount Refrigerator
GE PGCS1NFZBSS Bottom-Mount Refrigerator
GE PGCS1NFZCSS Bottom-Mount Refrigerator
GE PGCS1NFZHSS Bottom-Mount Refrigerator
GE PGCS1NFYASS Bottom-Mount Refrigerator
GE PGCS1RKZASS Bottom-Mount Refrigerator
GE PFSS5NFYASS Bottom-Mount Refrigerator
GE PFSS5NFYCSS Bottom-Mount Refrigerator
GE PFSS5NFZASS Bottom-Mount Refrigerator
GE PFSS5NFZBSS Bottom-Mount Refrigerator
GE PGCS1PJYASS Bottom-Mount Refrigerator
GE PGCS1PJZASS Bottom-Mount Refrigerator
GE PGCS1PJZBSS Bottom-Mount Refrigerator
GE PGCS1PJZCSS Bottom-Mount Refrigerator
Showing 1-15
of 87
| Manufacturer Name: GENERAL ELECTRIC Product Number: WR14X10305 OEM Part Number: WR14X10305 Product Description: Gasket French With Flap |
Choose the best Home Appliance parts and supplies from HnKParts!
Same Day Shipping
Best Quality And Best Price
Wide Range of Inventory
Best Customer Service
Have More Questions or Need Help to Place The Order?
Reach us at (866)723-0907 or [email protected]
Write Your Own Review
Customer Questions
Installation Steps
Step1: Unplug the refrigerator to prevent electrical hazards before starting.
Step2: Open the door and remove the old gasket by loosening the retaining screws.
Step3: Align the new gasket evenly around the door frame and secure it firmly.
Step4: Tighten screws gradually without over-tightening.
Step5: Close the door and inspect for proper sealing and flap alignment.
