Special Price
$74.93
Regular Price
$88.14
In stock
Available Quantity:
44
SKU
WPW10594329
The 
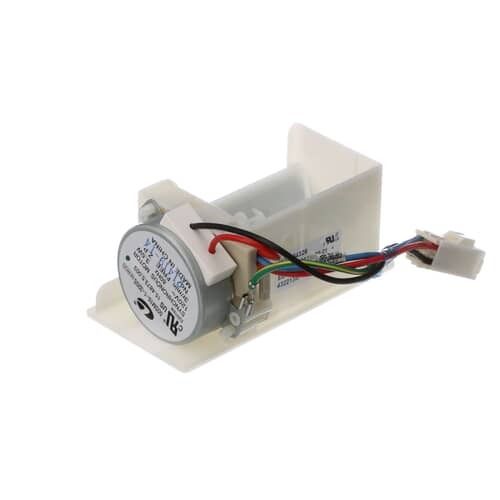
Whirlpool WPW10594329 Refrigerator Damper Control Assembly regulates airflow to maintain optimal cooling. It adjusts the air passage between compartments based on temperature needs. A motorized mechanism opens or closes the damper, ensuring consistent cooling and preventing frost buildup. Proper airflow distribution enhances food preservation while reducing energy consumption. This component helps maintain ideal temperature levels, improving overall refrigerator efficiency and performance.
Manufacturer
✓ This Product Replaces:
W10207517, W10594329
This Part Fits the Following Models (370)
IKEA IX6HHEXDSM00 Refrigerator
IKEA IX6HHEXDSM01 Refrigerator
Maytag MFD2562VEB5 Bottom-Mount Refrigerator
Maytag MFD2562VEM11 Bottom-Mount Refrigerator
Maytag MFD2562VEW2 Bottom-Mount Refrigerator
Maytag MFD2562VEW3 Bottom-Mount Refrigerator
Maytag MFD2562VEM5 Bottom-Mount Refrigerator
Maytag MFD2562VEW6 Bottom-Mount Refrigerator
Maytag MFC2062FEZ02 Bottom-Mount Refrigerator
Maytag MFC2062FEZ03 Bottom-Mount Refrigerator
Maytag MFC2061KES7 Bottom-Mount Refrigerator
Maytag MFC2061KES8 Refrigerator
Maytag MFC2061KES6 Bottom-Mount Refrigerator
Maytag MFC2062DEM01 Bottom-Mount Refrigerator
Maytag MFD2562VEA1 Bottom-Mount Refrigerator
Showing 1-15
of 370
| Manufacturer Name: WHIRLPOOL Product Number: WPW10594329 OEM Part Number: WPW10594329 Product Description: Control Damper |
Choose the best Home Appliance parts and supplies from HnKParts!
Same Day Shipping
Best Quality And Best Price
Wide Range of Inventory
Best Customer Service
Have More Questions or Need Help to Place The Order?
Reach us at (866)723-0907 or [email protected]
Write Your Own Review
Customer Questions
Installation Steps
Step1: Unplug the refrigerator to ensure safety.
Step2: Remove the interior panel covering the damper assembly.
Step3: Disconnect the wiring harness from the old damper control.
Step4: Unscrew and remove the old assembly.
Step5: Install the new damper control, secure with screws, and reconnect wiring.
Step6: Replace the panel and restore power.
