
Special Price
$169.10
Regular Price
$185.95
In stock
Available Quantity:
64
SKU
WPW10485951
✓ This Product Replaces:
W10485951
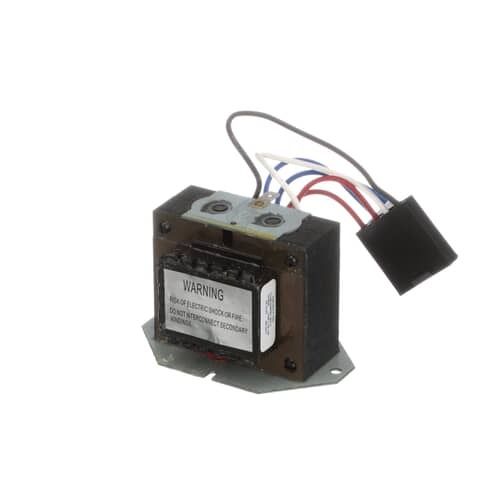
The Whirlpool WPW10485951 Refrigerator Ice Grid Transformer is responsible for powering the ice maker, it steps down the voltage to the appropriate amount of voltage required. It is built to be long-lasting and maintains the flow of power, which can be interrupted and cause issues with the operation. This component ensures that there are proper freezing cycles so that the ice maker can perform well.
Manufacturer

This Part Fits the Following Models (89)
Maytag MIM1555ZRS0 Freestanding Ice Maker
Maytag MIM1554ZRS0 Freestanding Ice Maker
KitchenAid KUID308HPS01 Freestanding Ice Maker
KitchenAid Freestanding Icemaker KUIX535HBS00 KUIX535HBS00
KitchenAid Freestanding Icemaker KUIX535HPA00 KUIX535HPA00
KitchenAid Freestanding Icemaker KUIX335HWH00 KUIX335HWH00
KitchenAid Freestanding Icemaker KUIX335HPS00 KUIX335HPS00
KitchenAid Freestanding Icemaker KUIX335HBL00 KUIX335HBL00
KitchenAid Freestanding Icemaker KUIO338HSS00 KUIO338HSS00
KitchenAid Ice Cube Maker KUIC18PNZS0 KUIC18PNZS0
KitchenAid Ice Cube Maker KUIS15NNZB0 KUIS15NNZB0
KitchenAid Ice Cube Maker KUIO18NNZS0 KUIO18NNZS0
KitchenAid Ice Cube Maker KUIS15NNZW0 KUIS15NNZW0
KitchenAid Ice Maker KUIC15POZP1 KUIC15POZP1
KitchenAid Ice Maker KUID308ESS0 KUID308ESS0
Showing 1-15
of 89
| Manufacturer Name: WHIRLPOOL Product Number: WPW10485951 OEM Part Number: WPW10485951 Product Description: Transformr |
Choose the best Home Appliance parts and supplies from HnKParts!
Same Day Shipping
Best Quality And Best Price
Wide Range of Inventory
Best Customer Service
Have More Questions or Need Help to Place The Order?
Reach us at (866)723-0907 or [email protected]
Write Your Own Review
Customer Questions
Installation Steps
Step1: Switch off power at breaker and unplug refrigerator.
Step2: Remove rear panel and locate old transformer assembly.
Step3: Disconnect wiring harness carefully and note connections.
Step4: Replace with new unit and secure mounting screws firmly.
Step5: Reassemble panel, restore power, and test function safely properly.
