
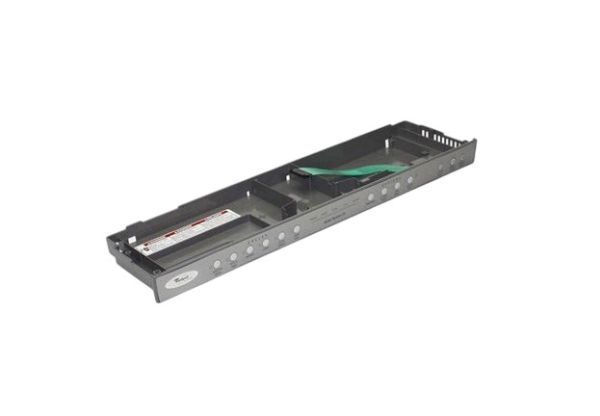
Whirlpool WPW10175241 Dishwasher Control Panel

Special Price $151.20 Regular Price $226.65
In stock
Available Quantity:   23
SKU
WPW10175241
✓ This Product Replaces: W10175241

Product Description

The Whirlpool WPW10175241 Dishwasher Control Panel is designed to operate by controlling the wash cycles effectively. It works by transmitting the selected commands by the user to the dishwasher’s control board, enabling the proper functioning of the cycle. It has buttons which can be easily pressed and the display is clear enough to allow easy changes to be made. It is an essential component that enhance the control panel performance and enhance the appliance usability and durability.
Manufacturer

https://www.hnkparts.com/media/catalog/product/w/p/wpw10175241-73968.jpg
Manufacturer Name: WHIRLPOOL
Product Number: WPW10175241
OEM Part Number: WPW10175241
Product Description: Panel-Cntl

Choose the best Home Appliance parts and supplies from HnKParts!

  • Same Day Shipping

  • Best Quality And Best Price

  • Wide Range of Inventory

  • Best Customer Service

Have More Questions or Need Help to Place The Order?
Reach us at (866)723-0907 or [email protected]

Write Your Own Review
You're reviewing:Whirlpool WPW10175241 Dishwasher Control Panel
Your Rating
Customer Questions
What maintenance is required for the Whirlpool WPW10175241 Control Panel?

Regularly wipe the dishwasher control panel with a soft, damp cloth to remove grease and residue. Avoid harsh chemicals to prevent damage. Ensure buttons are not sticky, and check for loose connections. Proper cleaning keeps controls responsive and prevents accidental malfunctions.

What are common issues with the Whirlpool WPW10175241 Control Panel?

  • Unresponsive or sticky buttons.
  • Display screen malfunctions or fading.
  • Erratic operation or incorrect cycle selection.
  • Loose or damaged wiring connections.

Installation Steps

Step1: Turn off power at breaker and unplug dishwasher for safety.

Step2: Open dishwasher door and remove inner panel screws carefully.

Step3: Disconnect old control panel wiring harness carefully.

Step4: Align new control panel and reconnect wiring securely properly.

Step5: Secure panel with screws and reassemble door firmly.

Step6: Restore power and test all operations after installation.

Step7: Ensure no loose connections before closing final assembly properly.