
$66.30
In stock
Available Quantity:
77
SKU
WPW10171529
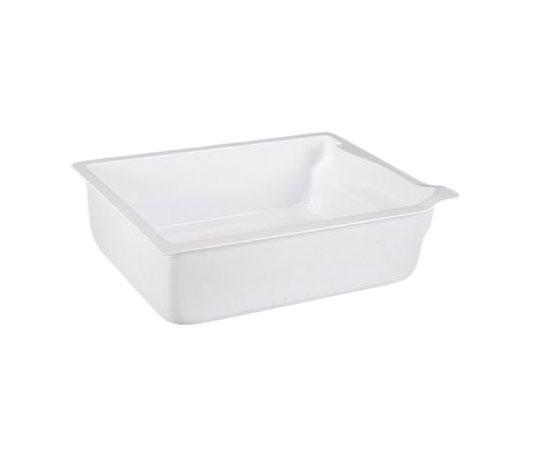
The Whirlpool WPW10171529 Refrigerator Ice Pan serves as an effective ice collector that prevents leaks and keeps the freezer area clean. The ice pan features a design that positions it under the ice maker to capture excess ice and water which promotes proper drainage and minimizes spillage. The durable construction allows the item to survive both harsh cold weather and repeated impacts without breaking. The ice pan functions as an essential component that protects freezer performance by stopping ice accumulation while providing smooth operation.
Manufacturer

✓ This Product Replaces:
W10182748, W10171529, W10740448N
This Part Fits the Following Models (608)
Maytag MFF2258VEA10 Bottom-Mount Refrigerator
Maytag MFF2258FEZ03 Bottom-Mount Refrigerator
Maytag MFF2258FEZ02 Bottom-Mount Refrigerator
Maytag MFF2258DEM01 Bottom-Mount Refrigerator
Maytag G32027WEKB3 Bottom-Mount Refrigerator
Maytag MFF2558VEQ1 Bottom-Mount Refrigerator
Maytag MFF2558VEM4 Bottom-Mount Refrigerator
Maytag MFF2558VEM5 Bottom-Mount Refrigerator
Maytag MFF2558VEW2 Bottom-Mount Refrigerator
Maytag MFF2558VEW4 Bottom-Mount Refrigerator
Maytag MFF2558VEW5 Bottom-Mount Refrigerator
Maytag MFF2258VEB8 Bottom-Mount Refrigerator
Maytag MFF2258VEM10 Bottom-Mount Refrigerator
Maytag MFC2061KES10 Bottom-Mount Refrigerator
Maytag MFC2062DEM00 Bottom-Mount Refrigerator
Showing 1-15
of 608
| Manufacturer Name: WHIRLPOOL Product Number: WPW10171529 OEM Part Number: WPW10171529 Product Description: Pan-Ice |
Choose the best Home Appliance parts and supplies from HnKParts!
Same Day Shipping
Best Quality And Best Price
Wide Range of Inventory
Best Customer Service
Have More Questions or Need Help to Place The Order?
Reach us at (866)723-0907 or [email protected]
Write Your Own Review
Customer Questions
Installation Steps
Step1: Ensure refrigerator is unplugged before starting.
Step2: Remove old ice pan and clear compartment.
Step3: Align new ice pan with rear guide rails.
Step4: Slide pan firmly into position until secure.
Step5: Check smooth movement and fit.
Step6: Restore power and allow cooling cycle.
Step7: Avoid forcing tray if misaligned.
