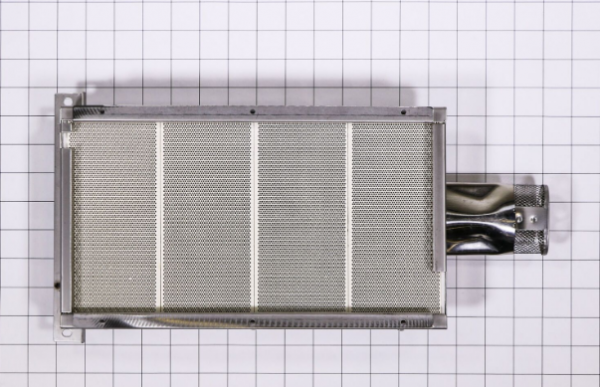
The Whirlpool WPW10134795 Burner burns and spreads uniform heat to provide stable cooking capabilities in ovens by transforming electrical or gas energy into regulated thermal energy. It is a part that produces flames or heats elements when the control system activates it and distributes the warmth uniformly throughout the oven cavity to achieve accurate baking and roasting.
Step 1: The stove should be disconnected from the electrical outlet and the circuit breaker that powers the oven should be deactivated.
Step 2: The top grates along with any other items on the burner surface of your range should be taken off.
Step 3: The screws that secure the control panel should be identified. These are typically located on either side of the control knobs or directly behind them. A Phillips-head screwdriver should be utilized to take out those screws.
Step 4: The control panel should be detached. It should be gently lifted upwards and set aside.
Step 5: Next, the screws that hold the burner box in position should be found. A Phillips-head screwdriver should be employed to loosen these screws.
Step 6: After the screws are loosened, a pair of needle-nose pliers should be used to carefully detach the wires linked to the old burner box.
Step 7: The old burner box can now be extracted. The new burner box should be positioned in its designated spot and fastened using the screws that were previously removed.
Step 8: With the needle-nose pliers, the wires should be reconnected to the new burner box. It should ensure that the connections are tight.
Step 9: The control panel should be reinstalled and secured with the screws that were taken out in step 3.
Step 10: The power to the oven should be reactivated and it should be reconnected to the electrical outlet. It should be verified that the burner functions correctly.
Step 11: The grates and any other items that were removed earlier should be reinserted.
The Whirlpool WPW10134795 BURNER box has now been successfully replaced.
Please be aware that these instructions serve as general guidance and should always be utilized alongside the manufacturer's manual, if available.