
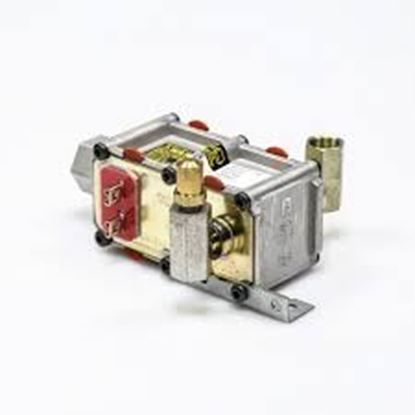
Whirlpool WP7501P232-60 Range Gas Control Valve

Special Price $185.95 Regular Price $231.68
In stock
Available Quantity:   6
SKU
WP7501P232-60
✓ This Product Replaces: 7501P232-60

Product Description

The Whirlpool WP7501P232-60 Range Gas Control Valve work by regulating the flow of gas depending on the desired temperature, which helps maintain the heat required for proper cooking. This valve functions as it opens and closes by the control signals to ensure that the flame is steady and that there is no issue of overheating or leakage of the gas. It reduce the wastage of gas and ensures that the heat is evenly distributed hence enhancing the cooking process.
Manufacturer

https://www.hnkparts.com/media/catalog/product/w/p/wp7501p232-60_whirlpool_hnkparts.jpg
Manufacturer Name: WHIRLPOOL
Product Number: WP7501P232-60
OEM Part Number: WP7501P232-60
Product Description: Valve-Oven

Choose the best Home Appliance parts and supplies from HnKParts!

  • Same Day Shipping

  • Best Quality And Best Price

  • Wide Range of Inventory

  • Best Customer Service

Have More Questions or Need Help to Place The Order?
Reach us at (866)723-0907 or [email protected]

Write Your Own Review
You're reviewing:Whirlpool WP7501P232-60 Range Gas Control Valve
Your Rating
Customer Questions
What maintenance is required for the Whirlpool WP7501P232-60 Gas Control Valve?

Regularly inspect the range gas control valve for leaks, corrosion, or debris. Clean surrounding areas to prevent buildup and ensure proper ventilation. Test connections carefully after maintenance and always turn off the gas supply before performing any service to ensure safety.

What are common issues with the Whirlpool WP7501P232-60 Gas Control Valve?

  • Gas not igniting or weak flame.
  • Erratic burner performance.
  • Valve leaks or gas odor.
  • Difficulty regulating heat levels.
  • Clicking or unusual sounds during operation.

Installation Steps

Step1: Turn off the gas supply and disconnect electrical power to the range before servicing.

Step2: Pull the range away from the wall and remove the rear access panel to reach the gas control valve.

Step3: Disconnect the gas lines and wire connections from the old valve using proper tools.

Step4: Install the new gas control valve in the same position and reconnect all fittings securely.

Step5: Reattach the access panel, restore gas and power, then check carefully for gas leaks before testing the oven operation