The store will not work correctly in the case when cookies are disabled.
We collect user information to provide a better user experience and protect the security of our website. By continuing to use our website, you acknowledge the use of cookies.
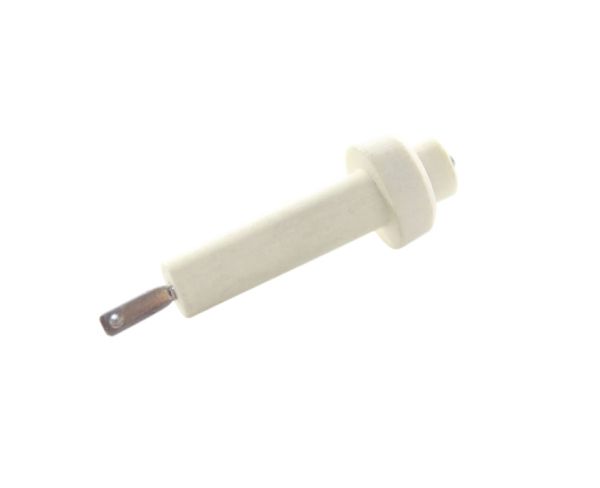
The Whirlpool WP7432P109-60 Range Surface Burner Igniter has become a small but essential part of your gas range. It generates the spark that ignites the gas burner when you turn the knob. The igniter, situated near the base of the burner, produces a high-voltage electrical current that jumps a gap, which produces a spark. This spark ignites the gas which travels through the burner opening, enabling you to immediately begin cooking. A faulty igniter could prevent the burner from lighting, which is either uncomfortable and inconvenient. Fortunately, replacing an outdated igniter is a relatively easy repair that can be performed by a do-it-yourselfer or an experienced appliance professional.
What maintenance is required for the Whirlpool WP7432P109-60 Spark Igniter?
Clean the range igniter with a damp cloth when cool to remove grease or debris. Ensure electrical connections are secure and dry. Avoid using sharp objects or abrasive cleaners. Regular inspection suppotys maintain accurate ignition and safe operation.
What are common issues with the Whirlpool WP7432P109-60 Spark Igniter?
Igniter fails to spark consistently.
Burners do not ignite properly.
Sparks are weak or intermittent.
Cracks or physical damage prevent ignition.
Installation Steps
Step 1: Cut off the power to the oven. Prior to commencing any work on your oven, it should ensure that the power is turned off at both the breaker and the wall switch.
Step 2: Take off the oven door. Depending on your oven’s model, a screwdriver may be required to unscrew the fasteners that hold the oven door in position. Be sure to keep any screws aside, as they will be needed to reattach the door after the ignitor has been replaced.
Step 3: Identify the old ignitor. After the door has been removed, the oven’s back panel can be accessed. Inside this panel, the current ignitor should be able to be seen. It might be challenging to reach, so the oven racks should be removed and a flashlight employed to assist in locating it.
Step 4: Extract the old ignitor. With a screwdriver, the bolts that hold the ignitor in place should be unfastened. Then, the ignitor should be gently pulled out of the oven.
Step 5: Put in the new ignitor. Next, your replacement ignitor (Model WP7432P109-60) should be taken and placed into the oven. The ignitor should be secured using the bolts.
Step 6: Reattach the oven door. Once the ignitor is firmly in place, the oven door can be put back on. It should ensure that the screws are reinserted and tightened securely.
Step 7: Restore power to the oven. Lastly, the power should be turned back on at both the breaker and wall switch. Your new ignitor should be tested to confirm that it is functioning correctly.
Please remember, these instructions serve as general guidance and should always be utilized alongside the manufacturer's manual, if one is available.