
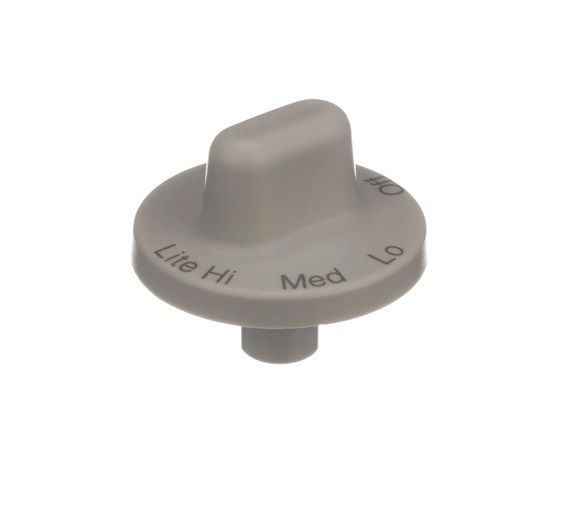
Whirlpool WP71001653 Cooktop Surface Burner Knob

Special Price $17.40 Regular Price $19.02
In stock
Available Quantity:   27
SKU
WP71001653

Product Description

The Whirlpool WP71001653 is an equivalent knob manufactured for Whirlpool ranges. The burner's heat setting is adjustable using a straightforward knob that mounts to the range top. This allows you to precisely manage the temperature of your cooking by allowing you to alter the flame size from low to high. You can easily resume cooking with your Whirlpool range again by replacing the broken or missing knob with this white one, which fixes the issue and restores functionality. Your Whirlpool range has to have a working range knob in order to cook safely and effectively. Cooking unevenly or even burning food can result from a broken or missing knob that makes it difficult or impossible to manage the heat of your burners.

Knobs,
Manufacturer
✓ This Product Replaces: 12001509, 71001653, 705315, 705436
https://www.hnkparts.com/media/catalog/product/w/p/wp71001653-88101.jpg

This Part Fits the Following Models (4)

Manufacturer Name: WHIRLPOOL
Product Number: WP71001653
OEM Part Number: WP71001653
Product Description: Knob-Cooktop White

Choose the best Home Appliance parts and supplies from HnKParts!

  • Same Day Shipping

  • Best Quality And Best Price

  • Wide Range of Inventory

  • Best Customer Service

Have More Questions or Need Help to Place The Order?
Reach us at (866)723-0907 or [email protected]

Write Your Own Review
You're reviewing:Whirlpool WP71001653 Cooktop Surface Burner Knob
Your Rating
Customer Questions
No Questions

Installation Steps

Step 1: Prior to starting, the power supply to your stove should be ensured disconnected.

Step 2: The old knob- switch should be detached and taken out utilizing a Phillips head screwdriver.

Step 3: The knob should be removed from the shaft by sliding it off the D-shaped end.

Step 4: The new knob should be placed onto the D-shaped end of the shaft and firmly pushed into position.

Step 5: The new knob should be fastened with the included screws and the power supply should be reconnected.

Step 6: The knob should be verified to function correctly by testing it.

It is important to note that these instructions are served as general guidance and should always be referenced alongside the manufacturer's manual, if available.
