
Special Price
$147.22
Regular Price
$164.95
In stock
Available Quantity:
11
SKU
WP4357099
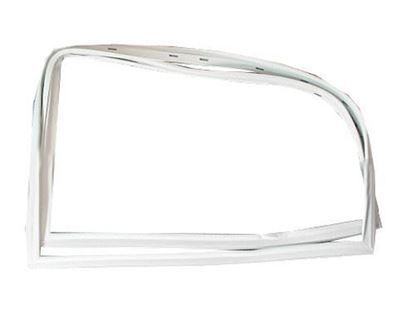
The Whirlpool WP4357099 Refrigerator Door Gasket creates a tight seal to keep cold air inside, ensuring efficient cooling. This flexible magnetic strip lines the refrigerator door, preventing air leaks and temperature fluctuations. It compresses when the door closes, blocking warm air from entering and maintaining consistent cooling performance. By preserving the internal temperature, it helps food stay fresh longer and reduces energy consumption. Its precise fit ensures proper insulation, enhancing cooling efficiency and preventing moisture buildup. With a simple installation process, this gasket restores the refrigerator’s performance, keeping food at the right temperature while lowering electricity costs.
Manufacturer

✓ This Product Replaces:
047526-01, 047526-03, 68001199, 4357085, 4357107, 047526-02, 4356815, 09100149, R0213257, 4357099, 4356997
This Part Fits the Following Models (108)
Roper RV1599REW00 Freezer
Roper RV15EFREW03 Freezer
Roper RV15EFRXW00 Freezer
Roper RV1599REW02 Freezer
Roper RV1599REW03 Freezer
Roper RV15EFRDW01 Freezer
Roper RV15EFREW02 Freezer
Roper RV15EFREW01 Freezer
Roper RV15EFREW00 Freezer
Amana ESUF17HW-P1179613WW Frost-Free Upright Freezer
Amana ESUF20HW-P1179614WW Frost-Free Upright Freezer
Amana ESUF15HW-P1179612WW Frost-Free Upright Freezer
Amana ESUF15HW-P1179605WW Frost-Free Upright Freezer
Amana ESU20HW/V57S-BAMW250 Upright Freezer
Amana ESU17HW/P1179610WW Upright Freezer
Showing 1-15
of 108
| Manufacturer Name: WHIRLPOOL Product Number: WP4357099 OEM Part Number: WP4357099 Product Description: Gasket-Dor |
Choose the best Home Appliance parts and supplies from HnKParts!
Same Day Shipping
Best Quality And Best Price
Wide Range of Inventory
Best Customer Service
Have More Questions or Need Help to Place The Order?
Reach us at (866)723-0907 or [email protected]
Write Your Own Review
Customer Questions
Installation Steps
Step1: Unplug the refrigerator and empty door shelves to ensure safe working conditions before starting.
Step2: Remove old gasket by loosening screws and gently peeling it from the door frame.
Step3: Align new gasket carefully, starting at top corners, pressing into groove evenly throughout.
Step4: Tighten screws gradually ensure seal is uniform and check for air leaks carefully.
Step5: Close door run unit for cooling test and avoid heavy usage.
