
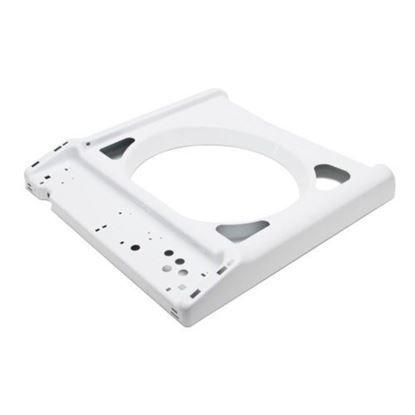
Whirlpool WP3957177 Washer Top Panel

Special Price $170.62 Regular Price $188.95
In stock
Available Quantity:   4
SKU
WP3957177

Product Description

The Whirlpool WP3957177 Top-Panel is designed to help regain the stability of the washer and its exterior look. This top panel is quite robust and serves the purpose of protecting the inside, and also serves as a working platform. Designed to fit and be mounted on without any difficulties to ensure a firm connection. Ensuring the washer works efficiently and increases longevity and the panel is designed to fit better.
Manufacturer

✓ This Product Replaces: 3957177
https://www.hnkparts.com/media/catalog/product/w/p/wp3957177_whirlpool_hnkparts.jpg
Manufacturer Name: WHIRLPOOL
Product Number: WP3957177
OEM Part Number: WP3957177
Product Description: Top

Choose the best Home Appliance parts and supplies from HnKParts!

  • Same Day Shipping

  • Best Quality And Best Price

  • Wide Range of Inventory

  • Best Customer Service

Have More Questions or Need Help to Place The Order?
Reach us at (866)723-0907 or [email protected]

Write Your Own Review
You're reviewing:Whirlpool WP3957177 Washer Top Panel
Your Rating
Customer Questions
What maintenance is required for the Whirlpool WP3957177 Top Panel?

Regularly wipe the washer top panel with a soft, damp cloth to remove dust and detergent residue. Avoid harsh chemicals that may damage the surface. Ensuring the panel is secure prevents rattling or misalignment during wash cycles. Always disconnect power before cleaning for safety.

What are common issues with the Whirlpool WP3957177 Top Panel?

  • Panel may become loose or misaligned, causing rattling noises.
  • Scratches or dents from heavy items placed on top.
  • Clips or screws may damage out, preventing proper attachment.
  • Paint or finish may discolor over time due to cleaning agents.

Installation Steps

Step1: Unplug washer and shut water supply for safety.

Step2: Remove rear screws securing old top panel carefully.

Step3: Slide panel backward and lift off.

Step4: Align new panel and secure screws firmly.

Step5: Check alignment and ensure panel is stable before restoring power.

Step6: Wear gloves to avoid sharp edge injuries during handling.