
Special Price
$92.76
Regular Price
$124.14
In stock
Available Quantity:
118
SKU
WP3403M075-10
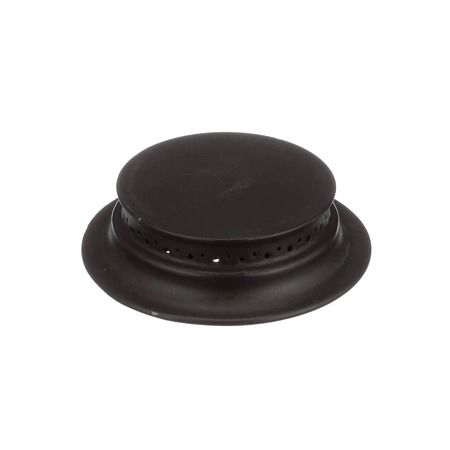
The Whirlpool WP3403M075-10 Range Gas Burner Head ensures efficient and consistent heat distribution for precise cooking results. Designed to fit select Whirlpool gas ranges, it directs and controls the flow of gas to create a steady flame for cooking. It works by allowing gas to pass through its ports, igniting evenly to provide uniform heat across the burner surface. This ensures better temperature control, reducing hot spots and improving cooking performance. With its precise flame control, it enhances fuel efficiency and helps achieve perfect cooking outcomes. The burner head supports various cooking needs, from simmering to high-heat searing, making meal preparation more effective and convenient.
Manufacturer

✓ This Product Replaces:
74005892, 3403M075-10
This Part Fits the Following Models (19)
Jenn-Air JDS9861AAP Range
Jenn-Air JDS9860BCP Range
Jenn-Air JGD8130ADS21 Gas Cooktop
Jenn-Air JGD8130ADS Cooktop
Jenn-Air JGD8130ADB21 Gas Cooktop
Jenn-Air JGD8130ADB Cooktop
Jenn-Air JGD8345ADB Cooktop
Jenn-Air JGD8348BDP Cooktop
Jenn-Air JGD8345ADB21 Gas Cooktop
Jenn-Air JGD8345ADB22 Gas Cooktop
Jenn-Air JGD8348CDP17 Gas Cooktop
Jenn-Air JGD8348CDP Cooktop
Jenn-Air JGD8348CDP16 Gas Cooktop
Jenn-Air JGA8100ADW Cooktop
Jenn-Air JGA8100ADB Cooktop
Showing 1-15
of 19
| Manufacturer Name: WHIRLPOOL Product Number: WP3403M075-10 OEM Part Number: WP3403M075-10 Product Description: Burnr-Head |
Choose the best Home Appliance parts and supplies from HnKParts!
Same Day Shipping
Best Quality And Best Price
Wide Range of Inventory
Best Customer Service
Have More Questions or Need Help to Place The Order?
Reach us at (866)723-0907 or [email protected]
Write Your Own Review
Customer Questions
Installation Steps
Step1: Turn off gas supply range and allow surface to cool completely before starting.
Step2: Remove burner grate and lift off old burner head.
Step3: Clean burner base and align new burner head over gas orifice and igniter.
Step4: Press firmly to seat securely, ensuring proper alignment and stability.
Step5: Reassemble components, restore gas, and test flame; check for leaks with soapy water.
