The store will not work correctly in the case when cookies are disabled.
We collect user information to provide a better user experience and protect the security of our website. By continuing to use our website, you acknowledge the use of cookies.
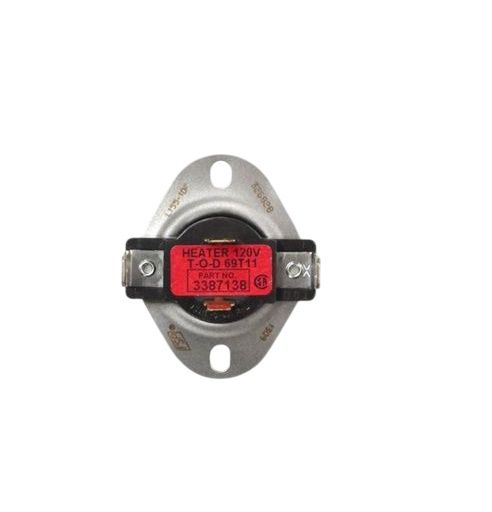
The Whirlpool WP3387138 Dryer Internal Bias Thermostat is a safety feature built into your dryer that protects your clothing and keeps them from overheating. It serves as a sentry, monitoring the temperature within the dryer. When airflow is impeded or faults occur, the thermostat adjusts the heating element to prevent dangerously high temperatures. It protects your clothing from burning and scorching by keeping everything within a safe range. A broken thermostat might lead to overheating in your dryer or damp clothes, resulting in longer drying periods. Replacing a faulty one with the Whirlpool WP3387138 improves drying performance, protects your laundry from heat damage, and promotes dryer safety.
Step 1: The refrigerator is disconnected from the power source.
Step 2: The screws securing the Whirlpool WP3387138 Thermostat are taken out using a Phillips-head screwdriver and placed aside.
Step 3: The cover of the Thermostat is removed and the wires are detached from the mounting bracket, ensuring no harm comes to the wires.
Step 4: The new Thermostat is positioned in the identical spot as the previous one, with the wires reattached to the mounting bracket.
Step 5: The Thermostat is fastened using the screws that were previously taken out.
Step 6: The refrigerator is reconnected to the power source and switched on.
Step 7: The temperature setting on the Thermostat is verified by opening the freezer and refrigerator door to ensure proper cooling.
Step 8: The Thermostat is modified as needed until the desired temperature is achieved.
Please note that these instructions are served as general guidance and should always be utilized alongside the manufacturer's manual, if one is available.