
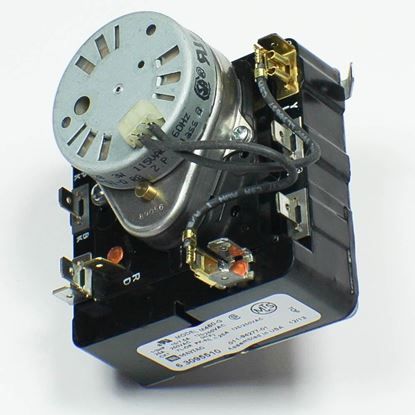
Whirlpool WP33001631 Dryer Timer

Special Price $181.65 Regular Price $227.43
In stock
Available Quantity:   10
SKU
WP33001631

Product Description

The Whirlpool WP33001631 Dryer Timer is an essential component that regulates the drying cycle in your Whirlpool or Maytag clothes dryer. This functions as the dryer, determining how long it tumbles and heats based on the drying setting delicates, heavy duty, etc. When you select a cycle, the timer triggers a series of events. This turns on the drum motor to rotate the clothing and engages the heating element to produce warm air for drying. The timer also controls the cool-down phase at the end of the cycle, preventing excessive wrinkling.  A broken timer can cause a variety of drying issues, including garments taking too long to dry, overheating, and not running at all. 

Manufacturer

✓ This Product Replaces: 33001631
https://www.hnkparts.com/media/catalog/product/w/p/wp33001631_whirlpool_hnkparts.jpg
Manufacturer Name: WHIRLPOOL
Product Number: WP33001631
OEM Part Number: WP33001631
Product Description: Timer

Choose the best Home Appliance parts and supplies from HnKParts!

  • Same Day Shipping

  • Best Quality And Best Price

  • Wide Range of Inventory

  • Best Customer Service

Have More Questions or Need Help to Place The Order?
Reach us at (866)723-0907 or [email protected]

Write Your Own Review
You're reviewing:Whirlpool WP33001631 Dryer Timer
Your Rating
Customer Questions
What maintenance is required for the Whirlpool WP33001631 Timer?

Regularly inspect the timer for dust, debris, or loose connections. Ensure the dryer is unplugged before any checks. Keeping contacts clean prevents misfires, and careful handling reduces the risk of electrical hazards during maintenance.

What are common issues with the Whirlpool WP33001631 Timer?

  • Dryer not starting or cycles skipping.
  • Timer not advancing properly.
  • Overheating or burning smell.
  • Inconsistent drying times or incomplete cycles.

Installation Steps

Step1: Disconnect power to the dryer to avoid electric shock.

Step2: Remove the control panel screws and gently lift the panel.

Step3: Locate and disconnect wires from the old timer.

Step4: Unscrew and remove the faulty timer unit.

Step5: Install the new timer and secure it with screws.

Step6: Reconnect wiring as per original configuration.

Step7: Reassemble the panel and restore power to test.