Whirlpool WP216201 Washer Valve-Inlt

$13.02
In stock
Available Quantity:   105
SKU
WP216201

Product Description

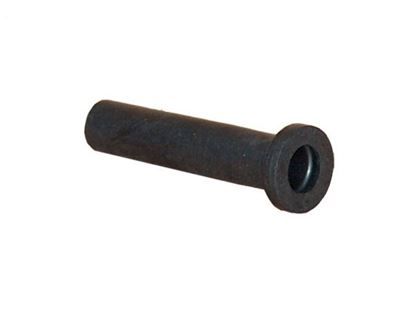
The Whirlpool WP216201 Washer Valve-Inlet, also known as an injector tube, is a critical component that controls water flow in your top-loading washing machine. This serves as an intermediary between the fill valve and the wash tub. When the washing machine starts a cycle that requires water, the fill valve opens, allowing water into the machine. The WP216201 then regulates the water flow rate and directs it into the wash tub to ensure thorough cleaning. A malfunctioning WP216201 can cause a variety of problems, including overflowing water, imbalanced loads due to unequal water distribution, and insufficient water for proper cleaning. Replacing a faulty WP216201 with a genuine Whirlpool part guarantees that your washing machine runs smoothly and produces thorough washes with the appropriate water levels.

Manufacturer
✓ This Product Replaces: 216201, 213016, LP581, 213016, 216201
https://www.hnkparts.com/media/catalog/product/w/p/wp216201_whirlpool_hnkparts.jpg

This Part Fits the Following Models (593)

Maytag LA8650 Washer Maytag LA8700 Washer Maytag LA8740 Washer Maytag LA8800 Washer Maytag LA882 Washer Maytag LA8820 Washer Maytag LA883 Washer Maytag LA884 Washer Maytag LA8840 Washer Maytag LA9200 Washer Maytag LA9300 Washer Maytag LA9400 Washer Maytag LA9400S Washer Maytag LA9400W Washer Maytag LA9600 Washer
Showing 1-15 of 593
Manufacturer Name: WHIRLPOOL
Product Number: WP216201
OEM Part Number: WP216201
Product Description: Valve-Inlt

Choose the best Home Appliance parts and supplies from HnKParts!

  • Same Day Shipping

  • Best Quality And Best Price

  • Wide Range of Inventory

  • Best Customer Service

Have More Questions or Need Help to Place The Order?
Reach us at (866)723-0907 or [email protected]

Write Your Own Review
You're reviewing:Whirlpool WP216201 Washer Valve-Inlt
Your Rating
Customer Questions
No Questions

Installation Steps

Step 1: Disconnect the Power Supply.

Step 2: Remove the Old Injector Valve.

Step 3: Clean the Holder.

Step 4: Install the New Injector Valve.

Step 5: Test the Valve.

Step 6: Reconnect the Power Supply.

Please remember, these instructions serve as general guidance and should always be used alongside the manufacturer's manual, if available.