General Electric WL49X20360 Washing Machine Sensor Speed Appliances Kit

Special Price $17.50 Regular Price $32.31
In stock
Available Quantity:   20
SKU
WL49X20360

Product Description

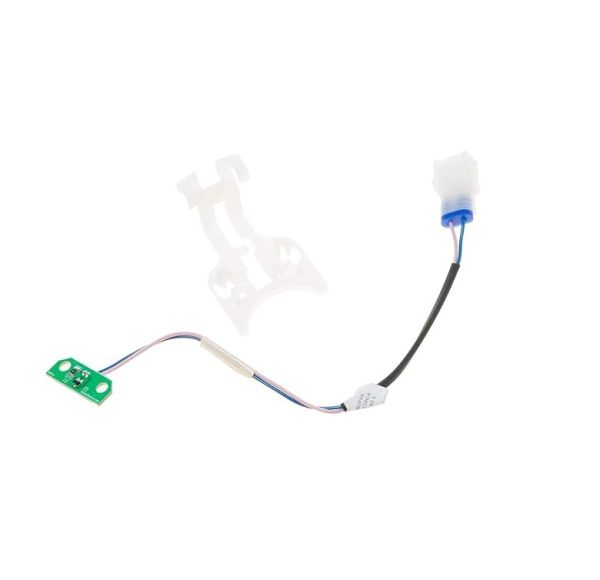
The General Electric WL49X20360 Sensor Speed Kit is used to enhance the performance of the washing machine to controls the speed of the motor during wash cycles and also regulates the speed of the motor during the wash cycles. The sensor is used in the detection of the load size and the water level and it adjusts the motor speed to improve on the energy usage and efficiency. This leads to shorter washing cycles, low energy usage, and increased durability of the washing machines.
Manufacturer
✓ This Product Replaces: WH12X10515, WL49X20360-24PK
https://www.hnkparts.com/media/catalog/product/w/l/wl49x20360-47030.jpg
Manufacturer Name: GENERAL ELECTRIC
Product Number: WL49X20360
OEM Part Number: WL49X20360
Product Description: Kit Sensor Speed

Choose the best Home Appliance parts and supplies from HnKParts!

  • Same Day Shipping

  • Best Quality And Best Price

  • Wide Range of Inventory

  • Best Customer Service

Have More Questions or Need Help to Place The Order?
Reach us at (866)723-0907 or [email protected]

Write Your Own Review
You're reviewing:General Electric WL49X20360 Washing Machine Sensor Speed Appliances Kit
Your Rating
Customer Questions
No Questions

Installation Steps

Step 1: The dryer is disconnected from the electrical outlet.

Step 2: The dryer door is opened and the two screws visible at the top of the dryer entrance are found.

Step 3: The two screws are gently unscrewed and taken out, with them placed aside for future use.

Step 4: The top of the dryer is carefully slid away from the cabinet and towards yourself.

Step 5: The old WL49X20360 GE Speed Sensor Kit is identified.

Step 6: The electrical connector linked to the sensor kit is detached.

Step 7: The old sensor kit is removed from the dryer.

Step 8: The new WL49X20360 GE Speed Sensor Kit is taken and carefully inserted into the dryer, then the electrical connector is reconnected.

Step 9: The dryer lid is closed and gently pressed down until it clicks back into position.

Step 10: The dryer lid is fastened with the two screws that were removed earlier.

Step 11: The dryer is reconnected to the electrical outlet.

Step 12: The dryer is verified to confirm that the new sensor kit is functioning.

Please remember that these instructions serve as general guidance and should always be utilized alongside the manufacturer's manual, if accessible.