The store will not work correctly in the case when cookies are disabled.
We collect user information to provide a better user experience and protect the security of our website. By continuing to use our website, you acknowledge the use of cookies.
Observance of Independence day July 4th we are closed [No shipping's and deliveries ] on 07/03/2026, Orders received after 3.00pm CST on 07/02/2026 will be shipping out on Monday 07/06/2026
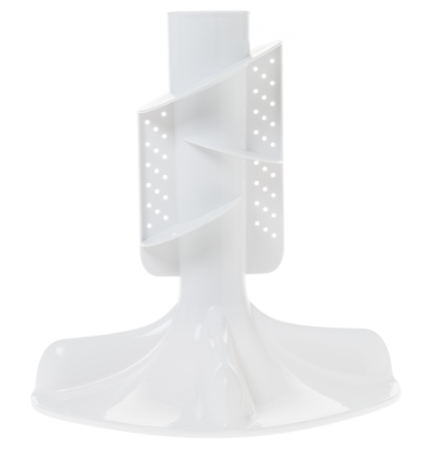
The General Electric WH43X30957 Washer Agitator Assembly is responsible for the proper and effective spinning of the clothes in water and detergent. This agitator moves from side to side and provides a vigorous water movement that helps to wash out dirt and stains on the fabrics. It is built to last and is reliable and does not stop or take action after a period of use. Therefore, by installing a new agitator, it improves washing effectiveness, the durability of the washer, and the cleanliness of the garments with each wash, making laundry work easy and productive.
Manufacturer Name:GENERAL ELECTRIC Product Number: WH43X30957 OEM Part Number: WH43X30957 Product Description: The GE Appliance WH43X30957 Agitator is a replacement agitator for certain GE top-load washers. It is made of plastic and has a cylindrical shape with a hole in the center. The agitator is attached to the transmission assembly and rotates during the wash cycle to help clean the clothes. This WH43X30957 agitator is equipped with a unique design that creates a pulsating, back-and-forth motion in the drum. This motion helps clothes rub against each other, promoting thorough cleaning.It is typically constructed from high-quality materials to withstand the wear and tear of regular use. It's built to last and provide reliable performance over an extended period. Replacing or installing an agitator typically requires some technical expertise, but it's a manageable task for those with experience in appliance repair. GE provides installation instructions to help guide users through the process.If you are experiencing any of these symptoms, it is best to replace the agitator. The agitator can be replaced by a qualified technician or by yourself if you are comfortable with DIY repairs.To replace the agitator, you will need to remove the old agitator and install the new one. The steps for removing and installing the agitator will vary depending on the model of your washing machine. You can find the instructions for your specific model in the washing machine's owner's manual.
Choose the best Home Appliance parts and supplies from HnKParts!
Is the Agitator compatible with all GE washing machine models?
Agitators can vary between GE washing machine models, so it's crucial to ensure that you purchase the correct Agitator that is compatible with your specific model.
Is there a specific orientation or alignment for installing the Agitator in my GE washing machine?
Yes, proper alignment and orientation are crucial during Agitator installation. Follow the manufacturer's instructions carefully to ensure the Agitator is correctly seated and secured to avoid issues during operation.
Are there any specific maintenance tasks I should perform to prolong the Agitator's lifespan?
Regular maintenance includes cleaning the Agitator and checking for any loose or damaged parts. Keeping the Agitator and its surroundings clean can help ensure efficient operation.
What maintenance is required for the General Electric WH43X30957 Agitator Assembly?
Inspect the agitator for cracks or damage frequently. Check splines for proper engagement and tighten bolts securely. Remove detergent or residue buildup that can impede movement. Proper maintenance ensures smooth operation and prevents operational issues during washing cycles.
What are common issues with the General Electric WH43X30957 Agitator Assembly?
Agitator not rotating.
Clothes are not moving properly.
Grinding noise during agitation.
Agitator loosening from the shaft.
Installation Steps
Step1: Unplug the washer to prevent electrical hazards.
Step2: Remove the fabric softener dispenser and cap from the old agitator.
Step3: Unscrew the old agitator and lift it out carefully.
Step4: Place the new agitator into the central post and align properly.
Step5: Secure with the mounting bolt and replace the cap.
Step6: Check for smooth rotation by turning manually.
Step7: Plug in the washer and run a test cycle to confirm operation.