Special Price
$66.91
Regular Price
$136.89
In stock
Available Quantity:
322
SKU
WE4M532
The 
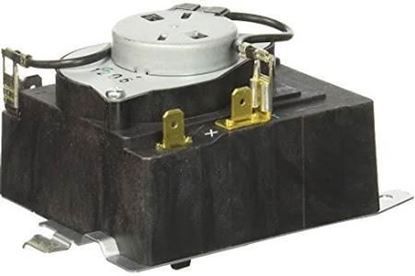
General Electric WE4M532 Dryer Timer regulates by controlling the duration of the cycles and the drum’s revolutions. It operates through the control of the drying time depending on the set parameters to achieve better drying cycles. The appliance has a timer through which it can change from heating, tumbling, and cooling processes. This replacement part is useful in repairing the dryer and enhancing it efficiency to reduce the time taken to dry clothes. It is essential for the proper functioning of a dryer and helps avoid such problems as over-drying or under-drying, and affecting the durability of the appliance.
Manufacturer
✓ This Product Replaces:
WE4M362, WE4M532-24PK
This Part Fits the Following Models (41)
GE DBLR333EG6CC Electric Dryer
GE DBLR333EG5WW Electric Dryer
GE DBLR333EG4WW Electric Dryer
GE DBLR333EG5CC Electric Dryer
GE DBLR333EG7WW Electric Dryer
GE DBLR333EG6WW Electric Dryer
GE DBLR333EG3CC Electric Dryer
GE DBLR333EG4CC Electric Dryer
GE DBLR333EG3WW Electric Dryer
GE GHDX100EM0WW Electric Dryer
GE DBLR333EG1CC Electric Dryer
GE DBLR333EG1WW Electric Dryer
GE DBLR333EG2CC Electric Dryer
GE DBLR333EG2WW Electric Dryer
GE DLLLR33EJ1WW Electric Dryer
Showing 1-15
of 41
| Manufacturer Name: GENERAL ELECTRIC Product Number: WE4M532 OEM Part Number: WE4M532 Product Description: Timer |
Choose the best Home Appliance parts and supplies from HnKParts!
Same Day Shipping
Best Quality And Best Price
Wide Range of Inventory
Best Customer Service
Have More Questions or Need Help to Place The Order?
Reach us at (866)723-0907 or [email protected]
Write Your Own Review
Customer Questions
Installation Steps
Step1: Disconnect power to dryer to avoid shock. Unplug dryer or switch off breaker before starting repair. Remove back panel screws and access control console.
Step2: Label and disconnect wire harness from old timer carefully.
Step3: Remove mounting knob and screws securing timer, replace with new unit aligning shaft.
Step4: Reconnect wiring per diagram, secure timer, reassemble panels.
Step5: Restore power and test cycle settings.
