
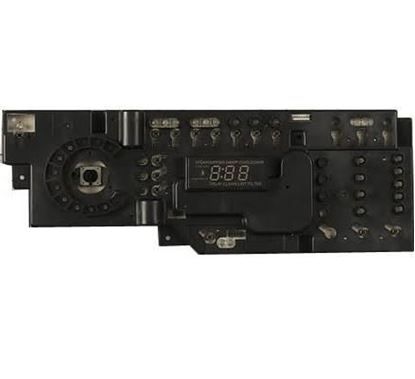
General Electric WE4M513 Dryer User Interface Board Assembly

Special Price $260.29 Regular Price $354.02
In stock
Available Quantity:   2
SKU
WE4M513

Product Description

The GENERAL ELECTRIC WE4M513 User Interface Board Assembly manages the dryer’s functions and lets users interact with it. It takes information from the buttons and knobs, then sends commands to the dryer’s parts to control drying cycles, heat and time, for a better and customized drying process.
Manufacturer

✓ This Product Replaces: WE4M514
https://www.hnkparts.com/media/catalog/product/w/e/we4m513_general-electric_hnkparts.jpg
Manufacturer Name: GENERAL ELECTRIC
Product Number: WE4M513
OEM Part Number: WE4M513
Product Description: User Interface Board Asm

Choose the best Home Appliance parts and supplies from HnKParts!

  • Same Day Shipping

  • Best Quality And Best Price

  • Wide Range of Inventory

  • Best Customer Service

Have More Questions or Need Help to Place The Order?
Reach us at (866)723-0907 or [email protected]

Write Your Own Review
You're reviewing:General Electric WE4M513 Dryer User Interface Board Assembly
Your Rating
Customer Questions
What maintenance is required for the General Electric WE4M513 User Interface Board Assembly?

Keep the dryer board clean by gently wiping it with a soft, dry cloth. Avoid using liquids directly on the board to avoid electrical damage. Inspect for loose connections and ensure buttons respond properly. Regular control assists avoid operational errors and display malfunctions.

What are common issues with the General Electric WE4M513 User Interface Board Assembly?

  • Dryer unresponsive or stuck buttons.
  • Display flickering or not lighting up.
  • Error codes appearing unexpectedly.
  • Intermittent or failed dryer cycle initiation.

Installation Steps

Step1: Unplug dryer and turn off power supply for safety.

Step2: Remove control panel screws and carefully detach the panel.

Step3: Disconnect wiring harnesses from the old interface board.

Step4: Unscrew and remove the faulty board.

Step5: Install the new board and secure it with screws.

Step6: Reconnect all wiring firmly.

Step7: Reassemble the control panel and restore power to test operation.