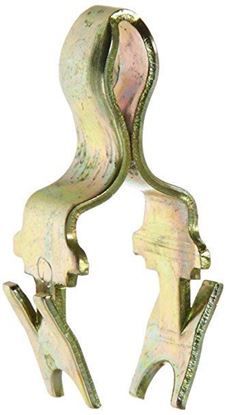
General Electric WE1X1192 Dryer Door Strike
Special Price
$3.16
Regular Price
$8.94
In stock
Available Quantity:
89
SKU
WE1X1192
Product Description
The General Electric WE1X1192 Dryer Door Strike interacts with the door latch to secure the door in a closed position during operation. Positioned on the cabinet frame at a designated alignment point, it interfaces with the latch assembly as part of the door retention arrangement. Its configuration supports consistent operation and release when the door is opened or closed, maintaining proper alignment between connected components. The strike operates within the door locking system to ensure enclosure stability and controlled access, supporting standard drying cycles, airflow containment, and safe operating conditions.
Manufacturer

✓ This Product Replaces:
WE1M314, WE01M0314, WE01X1192