
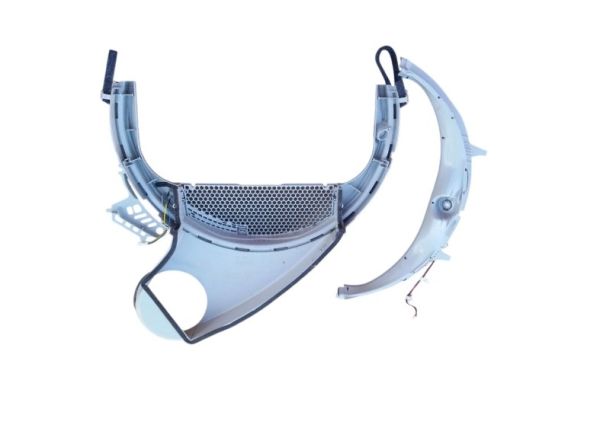
General Electric WE14X25086 Dryer Trap Duct Assembly

Special Price $142.72 Regular Price $164.95
In stock
Available Quantity:   47
SKU
WE14X25086
✓ This Product Replaces: WE14M181

Product Description

The General Electric WE14X25086 Dryer Trap Duct Assembly is a functional part that directs the airflow of the dryer drum to the lint trap and vent system. It operates by channeling hot air and lint over the duct and avoiding obstructions, ensuring a smooth flow of air. It is fitted inside the dryer, and it is attached to the drum outer vent and the airflow and circulating air system.
Manufacturer

https://www.hnkparts.com/media/catalog/product/w/e/we14x25086-45154.jpg
Manufacturer Name: GENERAL ELECTRIC
Product Number: WE14X25086
OEM Part Number: WE14X25086
Product Description: Trap Duct Asm

Choose the best Home Appliance parts and supplies from HnKParts!

  • Same Day Shipping

  • Best Quality And Best Price

  • Wide Range of Inventory

  • Best Customer Service

Have More Questions or Need Help to Place The Order?
Reach us at (866)723-0907 or [email protected]

Write Your Own Review
You're reviewing:General Electric WE14X25086 Dryer Trap Duct Assembly
Your Rating
Customer Questions
What maintenance is required for the General Electric WE14X25086 Trap Duct Assembly?

Regularly inspect and clean the dryer duct assembly to remove lint and debris, ensuring proper airflow. Check for cracks or loose connections, secure fittings, and follow better precautions by disconnecting power before cleaning to prevent fire hazards.

What are common issues with the General Electric WE14X25086 Trap Duct Assembly?

  • Lint buildup causing restricted airflow.
  • Cracks or splits leading to leaks.
  • Loose or disconnected sections.
  • Reduced dryer efficiency or overheating.

Installation Steps

Step1: Unplug dryer from power outlet and turn off gas supply if applicable.

Step2: Remove front or rear panel carefully to access trap duct area.

Step3: Detach old trap duct assembly and inspect all mounting points for damage.

Step4: Align and install new assembly securely into position.

Step5: Reassemble panels, restore power, and test airflow for proper operation.

Step6: Ensure no tools remain inside before closing unit.