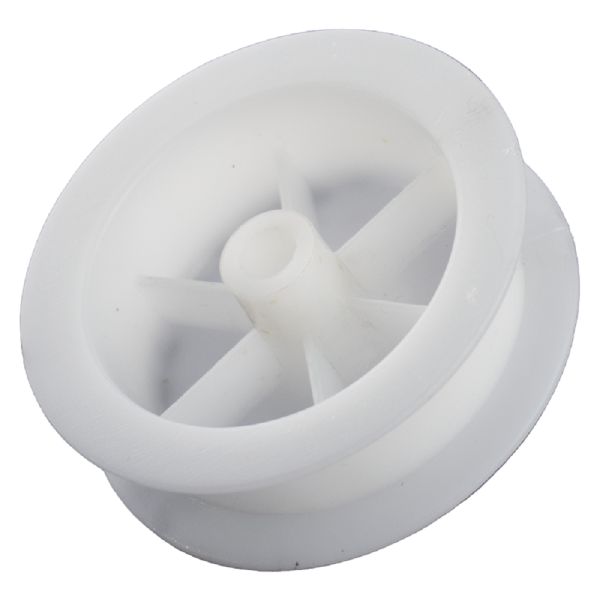
The General Electric WE03X31620 Dryer Idler Pulley effectively redirects the belt to rotate the drum, allowing the dryer to operate more smoothly and efficiently. The WE03X31620 is specifically designed for use with GE dryers, ensuring dependable performance and lifespan.This pulley operates by attaching to the dryer's motor and exerting strain to the drum belt, preventing slippage and maintaining proper drum rotation throughout drying cycles. By minimizing friction and ensuring proper alignment, it helps to increase the life of both the dryer motor and belt. Users benefit from quieter operation and less wear and tear on dryer components, which leads to fewer maintenance concerns and lower long-term repair costs.
Step 1: The necessary tools required for this task will be assembled. A Phillips head screwdriver, pliers, a hammer, and a flathead screwdriver will be essential.
Step 2: The dryer will be disconnected from the electrical outlet and the gas valve will be shut off if present.
Step 3: The screws securing the back panel to the dryer will be taken out and it will be carefully detached.
Step 4: The GE WE03X31620 Pulley located at the rear of the drum will be found and it will be gently extracted by loosening the retaining nut and washer with pliers.
Step 5: The new pulley will be positioned onto the shaft.
Step 6: The washer and nut will be reattached over the pulley and they will be secured tightly using pliers.
Step 7: The back panel will be reattached and the screws will be inserted.
Step 8: The dryer will be reconnected to the electrical outlet and the gas valve will be turned back on if necessary.
Step 9: The dryer’s operation will be verified by running a cycle to confirm the pulley functions properly.
Please note, these instructions are served as general guidance and should always be utilized along with the manufacturer's manual, if accessible.