
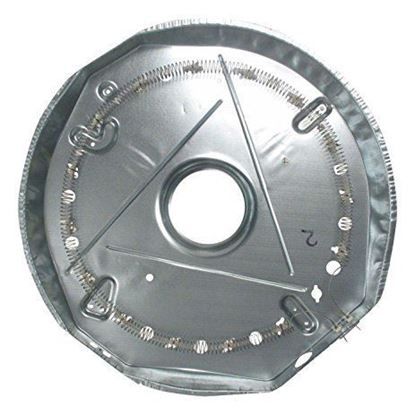
General Electric WE11X99 Dryer Heater Element Assembly

Special Price $164.75 Regular Price $196.09
In stock
Available Quantity:   41
SKU
WE11X99
✓ This Product Replaces: WE11X0099

Product Description

General Electric WE11X99 Dryer Heater Element Assembly effectively produces heat by transforming electrical energy into heat energy to dry clothes properly. It is used as a spare part for compatible dryers and helps to restore the heating function in case the original element is damaged. It is made of durable materials and has a feature of evenly distributing heat to avoid over damping or over drying of clothes, and increases the durability and effectiveness of the appliance while also regulating the drying cycles.
Manufacturer

https://www.hnkparts.com/media/catalog/product/w/e/we11x99_general-electric_hnkparts.jpg
Manufacturer Name: GENERAL ELECTRIC
Product Number: WE11X99
OEM Part Number: WE11X99
Product Description: Heater & Housing Assm

Choose the best Home Appliance parts and supplies from HnKParts!

  • Same Day Shipping

  • Best Quality And Best Price

  • Wide Range of Inventory

  • Best Customer Service

Have More Questions or Need Help to Place The Order?
Reach us at (866)723-0907 or [email protected]

Write Your Own Review
You're reviewing:General Electric WE11X99 Dryer Heater Element Assembly
Your Rating
Customer Questions
What maintenance is required for the General Electric WE11X99 Heater Element Assembly?

Regularly inspect the heater element for signs of wear, burn marks, or loose connections. Ensure the dryer vent is clean to prevent overheating. Unplug the dryer before any inspection or service to maintain safety, and check for proper electrical connections.

What are common issues with the General Electric WE11X99 Heater Element Assembly?

  • Heater fails to heat.
  • Overheating or inconsistent drying.
  • Tripped circuit breaker.
  • Element burnouts or visible damage.

Installation Steps

Step1: Disconnect dryer from power and confirm no voltage is present.

Step2: Remove rear panel and locate heater housing assembly.

Step3: Disconnect wiring harness carefully, noting terminal positions.

Step4: Unscrew and remove old heater element assembly from mounting bracket.

Step5: Install new heater element assembly and secure all fasteners tightly.

Step6: Reconnect wiring, close panel, restore power; test heat cycle.