The 
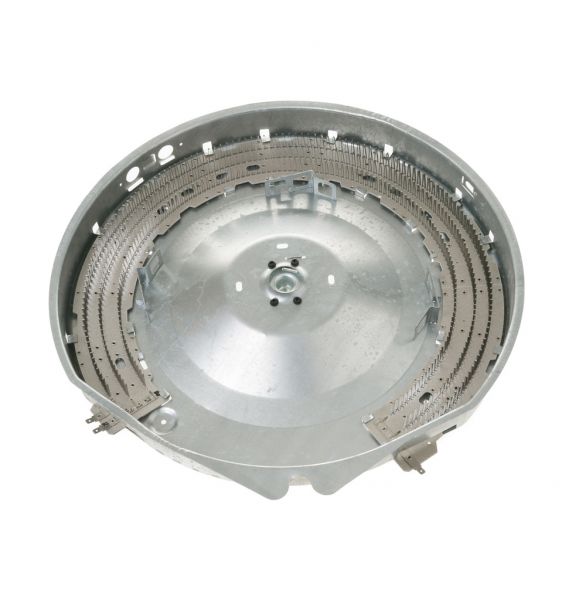
General Electric WE11X21156 Dryer Heater and Housing Assembly contains a premium heating element that transforms electrical power into heat which spreads uniformly across the dryer drum. The heating mechanism circulates thermal energy through the dryer drum to speed up and accomplish effective drying. The heating element housing serves two functions: it maintains a secure position and enables sufficient ventilation to achieve uniform heat distribution. A thermostat combined with a thermal fuse found in the assembly protects both the dryer’s safety and its extended lifespan by monitoring and controlling heat levels. The dryer operates more efficiently because temperature optimization shortens drying cycles. The assembly operates without interruption which enhances performance.
Step 1: Disconnect the Power Prior to commencing, it should ensure that power to the unit is disconnected by either switching off the circuit breaker or unplugging the unit from the outlet.
Step 2: Remove the Front Panel To take off the front panel, the two screws securing it should be removed. The front panel should be gently pulled away from the unit and placed aside.
Step 3: Detach Wiring Harness The two screws that secure the wiring harness to the unit should be removed. The harness should be carefully pulled away from the unit and set aside.
Step 4: Remove Existing Heater & Housing Assembly The four screws securing the heater & housing assembly should be gently unscrewed. The assembly should be extracted from the unit and placed aside.
Step 5: Insert New Heater & Housing Assembly The new GE WE11X21156 heater & housing assembly should be positioned into the unit. It should ensure that the components are correctly aligned and fastened in place using the four mounting screws.
Step 6: Attach Wiring Harness The wiring harness should be secured to the unit with the two mounting screws. It should be confirmed that the connections are snug and secure.
Step 7: Reattach the Front Panel The front panel should be reinstalled onto the unit and fastened with the two mounting screws.
Step 8: Reconnect the Power Power to the unit should be restored by switching the circuit breaker back on or plugging it into the outlet.
Please remember that these instructions serve as general guidance and should always be utilized alongside the manufacturer's manual, if accessible.