The store will not work correctly in the case when cookies are disabled.
We collect user information to provide a better user experience and protect the security of our website. By continuing to use our website, you acknowledge the use of cookies.
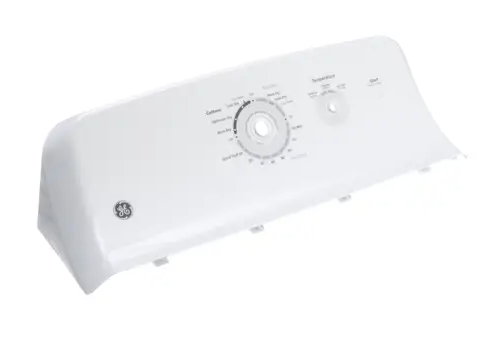
The General Electric WE03X25284 Dryer Backsplash Assembly is a part that serves as a shield that encases control buttons and display parts. It is designed to fit the dryer structure perfectly to allow for easy operation and to minimize the chances of breaking. Intended for durability, it ensures the dryer’s performance and provides a sleek look at the same time. Its durability protects internal parts from damage and the design of the appliance makes it easy to operate.
What maintenance is required for the General Electric WE03X25284 Backsplash Assembly?
Wipe the backsplash with a soft, damp cloth to remove dust and lint. Ensure it is seated evenly against the dryer top. Proper maintenance keeps the assembly stable and protects surrounding surfaces from heat or spills.
What are common issues with the General Electric WE03X25284 Backsplash Assembly?
Backsplash shifts out of position.
Mounting clips loosen over time.
Moisture collects behind backsplash.
Edges rub against dryer surface.
Installation Steps
Step1: Unplug the dryer to ensure safety.
Step2: Lift the old backsplash assembly carefully and detach it from the dryer.
Step3: Align the new backsplash assembly with the mounting points.
Step4: Secure the assembly with screws, ensuring it sits flush.
Step5: Reinstall the top panel, restore power, and check for proper fit and stability.