The store will not work correctly in the case when cookies are disabled.
We collect user information to provide a better user experience and protect the security of our website. By continuing to use our website, you acknowledge the use of cookies.
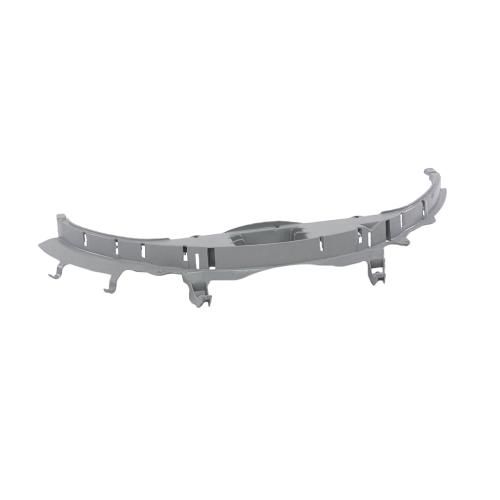
The General Electric WE03X25079 Dryer Top Bearing supports the upper front part of the unit's drum and minimizes the friction during the rotation. It is mounted in the front panel of the cabinet on the top opening where the rim of the drum touches the bearing surface as it turns. The component is consistent with the retaining points and other surrounding front support objects to ensure the drum spacing. Its bearing surface assists in the rotation and stabilizes the movement of the drums during the drying process.
Step 1: Disconnect the dryer. The dryer should be disconnected to guarantee that it is not receiving any electrical power.
Step 2: Take out the old bearing. The front panel of the dryer should be taken out by loosening the screws on both sides using a screwdriver. Any wiring connections should be detached and the front panel should be completely removed. The old bearing should be identified and a putty knife should be utilized to extract it from the grooves along the edges.
Step 3: Sanitize the surface. The surface should be sanitized to eliminate all dirt and debris.
Step 4: Position the new bearing. The new GE WE03X25079 top bearing should be positioned into the grooves. It should ensure that it is firmly secured and properly aligned before proceeding to the next step.
Step 5: Reconstruct the dryer. The dryer should be reconstructed by reinstating the front panel and securely reattaching any wires. It should be confirmed that everything is tightly secured.
Step 6: Evaluate the dryer. The dryer should be plugged in and its operation should be evaluated to verify that the new bearing is functioning correctly. If all appears and sounds appropriate, then the replacement process is finished.
Please remember, these instructions serve as general guidance and should always be referenced alongside the manufacturer's manual, if available.