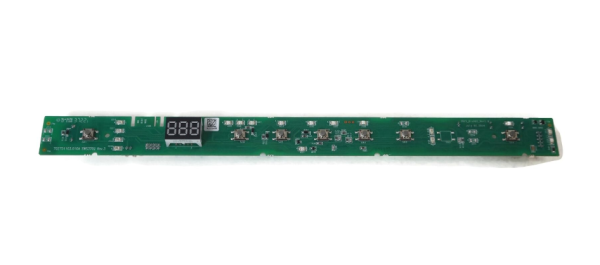
General Electric WD21X31910 Dishwasher User Interface Board
Special Price
$101.90
Regular Price
$167.30
In stock
Available Quantity:
330
SKU
WD21X31910
Product Description
The General Electric WD21X31910 Dishwasher Configured User Interface Control Board is a control panel that has the ability to control the settings, cycles, and operations of the appliance for proper functioning. It is designed to accept inputs from the user, to process the commands, and to control internal parts for washing, rinsing, and drying processes. Designed to be accurate, it enhances productivity, durability of the dishwasher.
Manufacturer
