
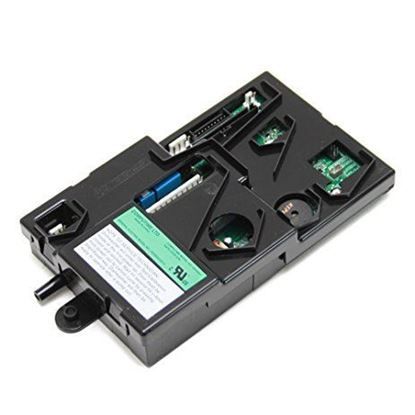
General Electric WD21X10370 Dishwasher Module Control Assembly

Special Price $143.04 Regular Price $164.95
In stock
Available Quantity:   34
SKU
WD21X10370

Product Description

The General Electric WD21X10370 Dishwasher Control Module Assembly regulates and coordinates major operations like the wash cycle, water temperature, and drying options. It controls the components of the dishwasher by processing the signals received by sensors and the inputs of the user to give efficient and consistent results.
Manufacturer

✓ This Product Replaces: WD21X10229, WD21X10252
https://www.hnkparts.com/media/catalog/product/w/d/wd21x10370_general-electric_hnkparts.jpg
Manufacturer Name: GENERAL ELECTRIC
Product Number: WD21X10370
OEM Part Number: WD21X10370
Product Description: Module Control Asm

Choose the best Home Appliance parts and supplies from HnKParts!

  • Same Day Shipping

  • Best Quality And Best Price

  • Wide Range of Inventory

  • Best Customer Service

Have More Questions or Need Help to Place The Order?
Reach us at (866)723-0907 or [email protected]

Write Your Own Review
You're reviewing:General Electric WD21X10370 Dishwasher Module Control Assembly
Your Rating
Customer Questions
What maintenance is required for the General Electric WD21X10370 Module Control Assembly?

Keep the dishwasher control assembly dry and clean by wiping with a soft, damp cloth. Avoid using excessive water or harsh chemicals that could damage circuitry. Inspect connections periodically for corrosion or loose wires. Proper care ensures accurate dishwasher operation and avoid electrical issues.

What are common issues with the General Electric WD21X10370 Module Control Assembly?

  • Dishwasher failing to start or respond.
  • Buttons or touchpad unresponsive.
  • Error codes displayed on control panel.
  • Intermittent or erratic cycle operation.

Installation Steps

Step1: Turn off the power supply and shut the water valve before starting work.

Step2: Remove the lower access panel to reach the control module housing.

Step3: Disconnect the wiring harness from the old module.

Step4: Remove mounting screws and take out the defective control unit.

Step5: Install the new module, reconnect the harness firmly, and secure the screws.

Step6: Reassemble the panel, restore power, and run a short cycle test.