The store will not work correctly in the case when cookies are disabled.
We collect user information to provide a better user experience and protect the security of our website. By continuing to use our website, you acknowledge the use of cookies.
Observance of Independence day July 4th we are closed [No shipping's and deliveries ] on 07/03/2026, Orders received after 3.00pm CST on 07/02/2026 will be shipping out on Monday 07/06/2026
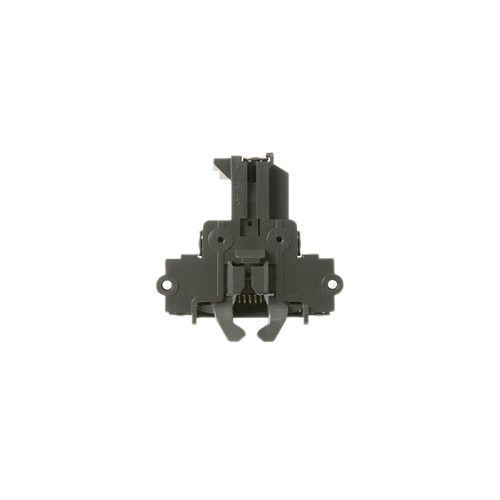
The General Electric WD01X29878 Dishwasher Door Latch is designed to lock properly to avoid any leakage and to work as required, intended to fit the door strike, it triggers the safety switch, which enables the dishwasher to operate only when the door is closed properly. This is a simple part to install and is vital for the proper functioning of the dishwashing with better results in every wash. This latch improves efficiency in terms of the cleanliness of the water, water conservation, and preventing any mishaps.
Step 1: The washer is disconnected from the power source and the water supply is shut off before starting.
Step 2: The door is opened and the screws located at the base of the washer's cabinet are taken out.
Step 3: The top section of the washer is removed and the insulation inside the washer is pulled back.
Step 4: While the latch handle is gripped with one hand, the screws that hold the latch to the washer are gently taken out using a screwdriver.
Step 5: The wiring harness is detached from the old latch, then it is extracted from the washer.
Step 6: The new door latch kit is positioned by sliding the latch into alignment over the door's strike plate.
Step 7: The wiring harness is attached to the new latch and it is fastened to the washer using the provided screws.
Step 8: The insulation and the top of the washer are reinstalled, along with the screws at the cabinet's base.
Step 9: The washer is reconnected to the power source and the water supply is turned on. The new latch is verified to function correctly to confirm proper installation.
Please be aware that these instructions are served as general advice and should be utilized alongside the manufacturer's manual, if available.