
Special Price
$15.00
Regular Price
$16.59
In stock
Available Quantity:
1081
SKU
WB31T10011
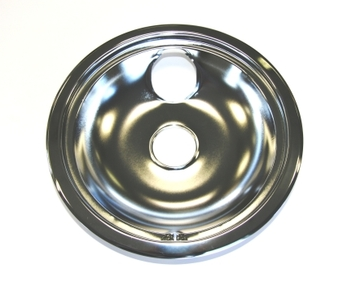
The General Electric WB31T10011 Range Burner Bowl efficiently collects spills and drips, keeping the stovetop clean and protected. Designed to sit beneath an 8-inch burner, it catches food debris and grease, preventing buildup that can affect cooking performance. Featuring a rear bubble design, it ensures a precise fit for compatible models. The chrome finish enhances durability and provides a sleek, reflective surface that complements various kitchen styles. This burner bowl helps maintain heat efficiency by reflecting heat toward cookware, promoting even cooking while reducing energy waste. Its easy-to-remove design allows for quick cleaning, contributing to a more hygienic cooking environment and extending the lifespan of the stovetop.
Manufacturer

This Part Fits the Following Models (675)
GE JMP28BA1 Electric Range
GE JMP28BA1AD Electric Range
GE JMP28BA2 Electric Range
GE JMP28BA2AD Electric Range
GE JMP28BC1 Electric Range
GE JMP28BC1AD Electric Range
GE JMP28BC2 Electric Range
GE JMP28BD1CT Electric Range
GE JMP28BD2CT Electric Range
GE JP328CF2CC Electric Range
GE JP328SF1SS Electric Range
GE JP328SF2SS Electric Range
GE JP328WF1WW Electric Range
GE JP328WF2WW Electric Range
GE JP626AV2AA Electric Range
Showing 1-15
of 675
| Manufacturer Name: General Electric Product Number: WB31T10011 OEM Part Number: WB31T10011 Product Description: 8 Bowl Rear Bubble Chrome" |
Choose the best Home Appliance parts and supplies from HnKParts!
Same Day Shipping
Best Quality And Best Price
Wide Range of Inventory
Best Customer Service
Have More Questions or Need Help to Place The Order?
Reach us at (866)723-0907 or [email protected]
Write Your Own Review
Customer Questions
Installation Steps
Step1: Turn off range power and ensure unit is cool.
Step2: Lift and remove burner coil to access drip bowl carefully.
Step3: Remove the old drip bowl and clean area of debris thoroughly.
Step4: Place new drip bowl securely into correct position.
Step5: Reinstall burner coil and ensure proper alignment and stability.
Step6: Restore power and test burner briefly for proper fit and function.
