
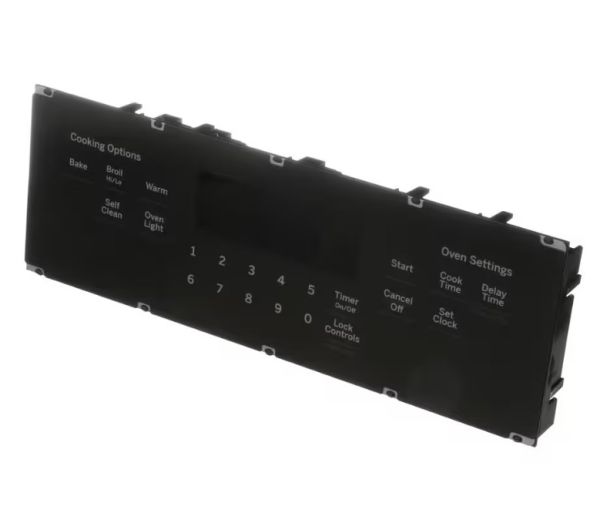
General Electric WB27X32140 Range Oven Control & Overlay Assembly

Special Price $240.67 Regular Price $335.28
In stock
Available Quantity:   31
SKU
WB27X32140

Product Description

The General Electric WB27X32140 Range Oven Control & Overlay Assembly has a control panel and a tough surface on which the settings and the features of the oven are indicated. This assembly is designed to fit into the oven wiring and enables the users to change the temperature, cooking modes, and time easily and accurately. This part replaces the failed part of the oven and brings back its efficiency and accuracy for proper cooking.
Manufacturer

✓ This Product Replaces: WB27X29062
https://www.hnkparts.com/media/catalog/product/w/b/wb27x32140.jpg
Manufacturer Name: GENERAL ELECTRIC
Product Number: WB27X32140
OEM Part Number: WB27X32140
Product Description: Oven Control And Overlay Asm

Choose the best Home Appliance parts and supplies from HnKParts!

  • Same Day Shipping

  • Best Quality And Best Price

  • Wide Range of Inventory

  • Best Customer Service

Have More Questions or Need Help to Place The Order?
Reach us at (866)723-0907 or [email protected]

Write Your Own Review
You're reviewing:General Electric WB27X32140 Range Oven Control & Overlay Assembly
Your Rating
Customer Questions
What maintenance is required for the General Electric WB27X32140 Control & Overlay Assembly?

Regularly wipe the control overlay with a soft, damp cloth to remove grease and residue. Check that all buttons respond correctly and that connections behind the panel are secure. Test all oven functions periodically. Avoid spilling liquids near the controls to prevent shorting.

What are common issues with the General Electric WB27X32140 Control & Overlay Assembly?

  • Buttons not responding consistently.
  • Oven cycles not initiating properly.
  • Temperature settings fluctuating.
  • Error codes displaying unexpectedly.

Installation Steps

Step1: Disconnect power to the range at the breaker panel.

Step2: Remove the rear control panel cover to access the control board.

Step3: Disconnect wiring connectors from the old control assembly.

Step4: Remove mounting screws and take out the control and overlay.

Step5: Install the new assembly and reconnect wiring securely.

Step6: Restore power, test oven settings, and display response.