
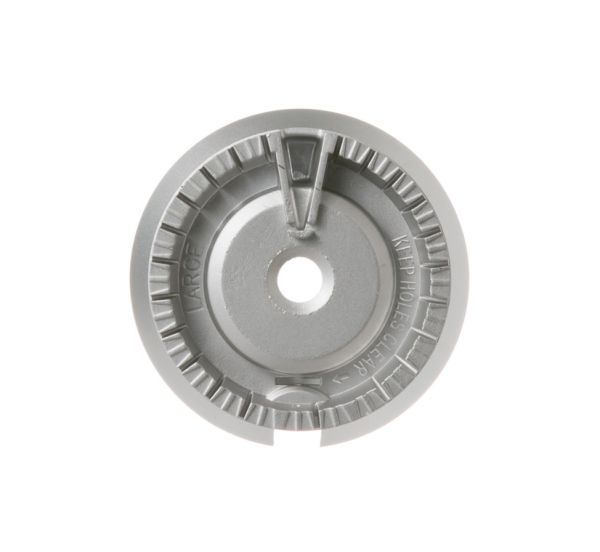
General Electric WB16T10046 Cooktop Gas Burner 12K BTU

$52.41
In stock
Available Quantity:   68
SKU
WB16T10046

Product Description

The General Electric WB16T10046 Cooktop Gas Burner 12K BTU produces a controlled flame output for surface cooking applications by combining gas and air for ignition and heat production. It is mounted on the cooktop surface assembly to attach to the burner base and connects to the gas supply orifice and ignition system by use of sealed fittings and positioning brackets. It is a burner head for regulated gas dispersion and flame stability. It will allow for normal cooking operation by delivering a BTU output for surface cooking cycles at the rating.
Burner,
Manufacturer
https://www.hnkparts.com/media/catalog/product/w/b/wb16t10046.jpg

This Part Fits the Following Models (1186)

GE PGP943DET1BB Gas Cooktop GE PGP943SET1SS Gas Cooktop GE PGP966DET1BB Gas Cooktop GE PGP986SET1SS Gas Cooktop GE PGP986SET2SS Gas Cooktop GE JGBP85WEL2WW Gas Range GE JGBP85BEL2BB Gas Range GE JGBP87DEM1WW Gas Range GE JGBP87DEM2BB Gas Range GE JGBP87DEM2WW Gas Range GE JGBP87DEM3BB Gas Range GE JGBP87DEM3WW Gas Range GE JGB3000ER3BB Gas Range GE JGB3000ER3WW Gas Range GE JGB3000ER4BB Gas Range
Showing 1-15 of 1186
MANUFACTURER NAME: GENERAL ELECTRIC
PRODUCT NUMBER: WB16T10046
OEM PART NUMBER: WB16T10046
PRODUCT DESCRIPTION: BURNER LARGE (12000)

CHOOSE THE BEST HOME APPLIANCE PARTS AND SUPPLIES FROM HNKPARTS!

  • SAME DAY SHIPPING

  • BEST QUALITY AND BEST PRICE

  • WIDE RANGE OF INVENTORY

  • BEST CUSTOMER SERVICE

HAVE MORE QUESTIONS OR NEED HELP TO PLACE THE ORDER?
REACH US AT (866)723-0907 OR [email protected]

Write Your Own Review
You're reviewing:General Electric WB16T10046 Cooktop Gas Burner 12K BTU
Your Rating
Customer Questions
No Questions

Installation Steps

Step 1: The power cord is disconnected from the outlet.

Step 2: The burner grates and caps are taken off.

Step 3: A Phillips head screwdriver is employed to take out the screws that hold the burner head to the surface burner.

Step 4: The old burner head is raised from the surface burner.

Step 5: The new burner head is positioned onto the surface burner, ensuring the screw holes on the burner head are aligned with those on the surface burner.

Step 6: The burner head is fastened using the original screws. The screws are tightened with the Phillips head screwdriver.

Step 7: The burner grates and caps are reattached onto the surface burner.

Step 8: The power cord is reconnected.

Please remember that these instructions are served as general guidance and should always be utilized alongside the manufacturer's manual, if one is accessible.
