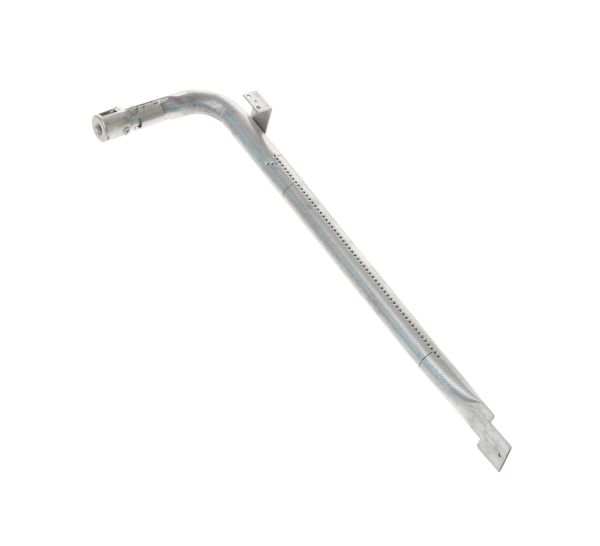
General Electric WB16K10043 Range Oven Burner Bake W/O Ignitor

Special Price $33.97 Regular Price $50.88
In stock
Available Quantity:   56
SKU
WB16K10043

Product Description

OVEN BURNER BAKE W/O IGNITOR
Igniters, Oven igniters ,
Manufacturer
✓ This Product Replaces: WB16K27, WB16K0027
https://www.hnkparts.com/media/catalog/product/w/b/wb16k10043-88963.jpg

This Part Fits the Following Models (487)

GE JGBS10BEF1BB Gas Range GE JGBS10BEH1BB Gas Range GE JGBS10BEH2BB Gas Range GE JGBS10BEH3BB Gas Range GE JGBS09PEH3WW Gas Range GE JGBS09PEH4WW Gas Range GE JGBS09PEH5WW Gas Range GE JGBS10WEF1WW Gas Range GE JGBS10WEH1WW Gas Range GE JGBS10WEH2WW Gas Range GE JGBS10WEH3WW Gas Range GE JGBS10WEH4WW Gas Range GE JGBS10WEH5WW Gas Range GE JGBS17PEA5 Gas Range GE JGBS17PEA3AD Gas Range
Showing 1-15 of 487
Manufacturer Name: General Electric
Product Number: WB16K10043
OEM Part Number: WB16K10043
Product Description: Oven Burner Bake W/O Ignitor

Choose the best Home Appliance parts and supplies from HnKParts!

  • Same Day Shipping

  • Best Quality And Best Price

  • Wide Range of Inventory

  • Best Customer Service

Have More Questions or Need Help to Place The Order?
Reach us at (866)723-0907 or [email protected]

Write Your Own Review
You're reviewing:General Electric WB16K10043 Range Oven Burner Bake W/O Ignitor
Your Rating
Customer Questions
No Questions

Installation Steps

Step 1: Your oven should be disconnected from the electrical outlet and the gas supply should be shut off.

Step 2: The bake burner should be taken out by gently unscrewing the fasteners that hold it to the bottom of the oven.

Step 3: Any additional components or accessories linked to the old burner, including a thermocouple, ignitor, pilots, or other elements, should be detached. The old burner should be disposed of in accordance with local regulations.

Step 4: The location where the new burner will be installed should be sanitized to guarantee that the burner is firmly secured.

Step 5: The new WB16K10043 GE Bake Burner without an ignitor should be positioned. The burner should be fastened using the screws that were utilized to detach the old burner.

Step 6: After the burner is secured, its functionality should be checked to confirm it operates correctly.

Step 7: The gas supply should be reconnected to the oven and the oven should be plugged back into the electrical outlet.

Step 8: The oven should be verified to ensure it is heating properly and functioning safely and accurately.

Please note that these instructions should be served as general guidance and should always be followed alongside the manufacturer's manual, if available.