
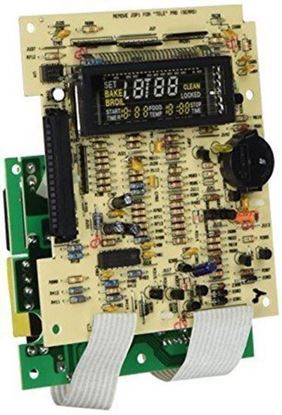
General Electric WB12K5005 Range Elec Oven Cntrl Board

$421.60
Out of stock
Available Quantity:   0
SKU
WB12K5005

Product Description

The GENERAL ELECTRIC WB12K5005 Range Oven Control Board is used to correct temperatures with which it operates, and responds precisely to settings for smooth cooking. The oven control panel sends input, and the oven performs this function by sending signals to heating elements, fans, and other components to keep everything working properly.
Manufacturer

https://www.hnkparts.com/media/catalog/product/w/b/wb12k5005_general-electric_hnkparts.jpg
Manufacturer Name: GENERAL ELECTRIC
Product Number: WB12K5005
OEM Part Number: WB12K5005
Product Description: Elec Oven Cntrl

Choose the best Home Appliance parts and supplies from HnKParts!

  • Same Day Shipping

  • Best Quality And Best Price

  • Wide Range of Inventory

  • Best Customer Service

Have More Questions or Need Help to Place The Order?
Reach us at (866)723-0907 or [email protected]

Write Your Own Review
You're reviewing:General Electric WB12K5005 Range Elec Oven Cntrl Board
Your Rating
Customer Questions
What maintenance is required for the General Electric WB12K5005 Control Board?

Ensure the range control board is kept free from dust and grease buildup by cleaning the surrounding area regularly. Avoid moisture exposure to prevent electrical damage. Check wiring connections periodically for security and wear. Always disconnect power before inspection to ensure safety.

What are common issues with the General Electric WB12K5005 Control Board?

  • Oven not heating or inconsistent temperature control.
  • Unresponsive or malfunctioning control panel.
  • Error codes displayed on the interface.
  • Intermittent power or failure to start cooking cycles.

Installation Steps

Step1: Disconnect the power at the breaker and confirm the oven is cool.

Step2: Remove the rear panel or control panel screws carefully.

Step3: Label and disconnect the wiring harness from the old control board.

Step4: Install the new board onto mounting studs and align connectors.

Step5: Reconnect wiring firmly, ensuring correct orientation.

Step6: Secure the panel and restore screws evenly.