
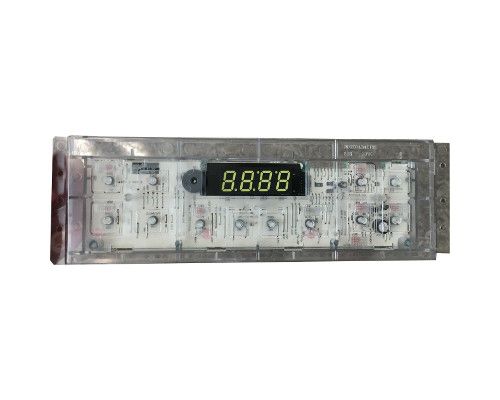
General Electric WB07X26701 Range Overlay T09

Special Price $27.12 Regular Price $45.95
In stock
Available Quantity:   28
SKU
WB07X26701

Product Description

The General Electric WB07X26701 Range Overlay T09 is the outer layer of the range and has the appearance of a modern and stylish design that will protect the internal parts. It is fitted by fixing it on the front side of the range in such a manner that it fits perfectly well on the appliance. The overlay is made from high-quality material and it can withstand heat, scratches, and general damage.
Manufacturer

✓ This Product Replaces: WB07X28841
https://www.hnkparts.com/media/catalog/product/w/b/wb07x28841_general-electric_hnkparts.png
MANUFACTURER NAME: GENERAL ELECTRIC
PRODUCT NUMBER: WB07X26701
OEM PART NUMBER: WB07X26701
PRODUCT DESCRIPTION: OVERLAY T09

CHOOSE THE BEST HOME APPLIANCE PARTS AND SUPPLIES FROM HNKPARTS!

  • SAME DAY SHIPPING

  • BEST QUALITY AND BEST PRICE

  • WIDE RANGE OF INVENTORY

  • BEST CUSTOMER SERVICE

HAVE MORE QUESTIONS OR NEED HELP TO PLACE THE ORDER?
REACH US AT (866)723-0907 OR [email protected]

Write Your Own Review
You're reviewing:General Electric WB07X26701 Range Overlay T09
Your Rating
Customer Questions
What maintenance is required for the General Electric WB07X26701 Overlay?

Regularly wipe the range overlay with a damp cloth and mild detergent to remove spills and debris. Avoid abrasive cleaners to prevent scratches. Inspect for cracks or warping, and ensure it sits securely to prevent heat damage.

What are common issues with the General Electric WB07X26701 Overlay?

  • Warping from high heat.
  • Scratches or surface damage.
  • Misalignment causing uneven cooking.
  • Discoloration over time.

Installation Steps

Step1: Turn off power at the circuit breaker and verify the range is fully powered down to prevent electrical shock.

Step2: Remove control knobs and carefully detach the existing old overlay from the control panel surface.

Step3: Clean the surface to remove adhesive residue and ensure a dry, dust-free installation area.

Step4: Align the new overlay and press firmly to ensure proper adhesion without air bubbles.

Step5: Reinstall knobs, restore power, and test all controls; avoid moisture exposure during installation.