
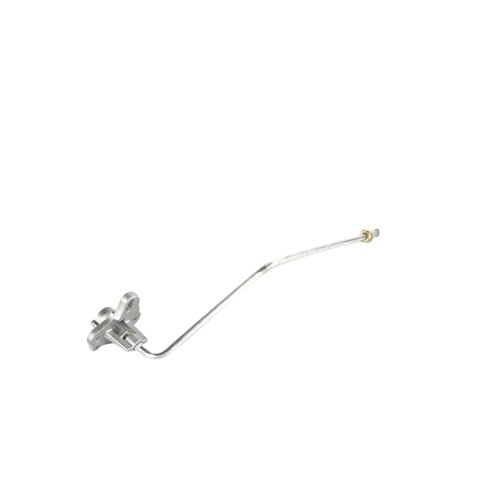
Whirlpool W11700294 Range Surface Burner Orifice Holder

Special Price $36.93 Regular Price $49.95
In stock
Available Quantity:   12
SKU
W11700294

Product Description

The Whirlpool W11700294 Range Surface Burner Orifice Holder allow the right amount of gas to the burner and is designed to safely attach to the orifice that controls the flow of gas for increase or decrease the flame size for the purpose of heat distribution. It plays a role in enhancing the cooking performance, safety, and avoiding leakage of the gas.
Manufacturer

https://www.hnkparts.com/media/catalog/product/w/1/w11700294-76324.jpg
MANUFACTURER NAME: WHIRLPOOL
PRODUCT NUMBER: W11700294
OEM PART NUMBER: W11700294
PRODUCT DESCRIPTION: HOLDER-ORF

CHOOSE THE BEST HOME APPLIANCE PARTS AND SUPPLIES FROM HNKPARTS!

  • SAME DAY SHIPPING

  • BEST QUALITY AND BEST PRICE

  • WIDE RANGE OF INVENTORY

  • BEST CUSTOMER SERVICE

HAVE MORE QUESTIONS OR NEED HELP TO PLACE THE ORDER?
REACH US AT (866)723-0907 OR [email protected]

Write Your Own Review
You're reviewing:Whirlpool W11700294 Range Surface Burner Orifice Holder
Your Rating
Customer Questions
What maintenance is required for the Whirlpool W11700294 Surface Burner Orifice Holder?

Inspect the range orifice holder regularly for grease buildup or debris that may block gas flow. Keep the surrounding burner area clean to ensure proper ignition. Check for secure placement and alignment. Always turn off gas and power before servicing.

What are common issues with the Whirlpool W11700294 Surface Burner Orifice Holder?

  • Improper gas flow causing weak or uneven flame.
  • Burner failing to ignite properly.
  • Misalignment affecting burner performance.
  • Gas leakage due to loose fitting.
  • Clogging from grease or food residue.

Installation Steps

Step1: Turn off gas supply and disconnect electrical power verify rangep is completely cool before starting.

Step2: Remove grates, burner cap, and surrounding components carefully.

Step3: Using proper wrench, unscrew old orifice holder and inspect connection area for debris.

Step4: Install new orifice holder and tighten securely without over-tightening to avoid damage.

Step5: Reassemble burner parts in reverse order and ensure alignment.

Step6: Restore gas and power, then test for leaks using soapy water solution.