
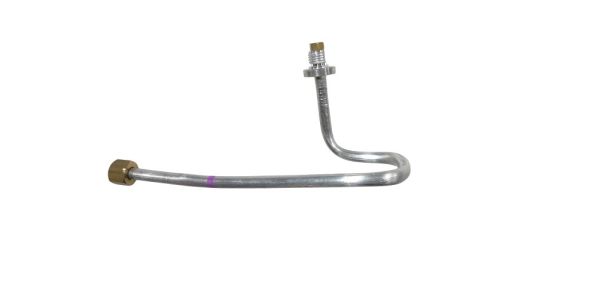
Whirlpool W11661107 Refrigerator Venturi

Special Price $57.99 Regular Price $85.50
In stock
Available Quantity:   15
SKU
W11661107

Product Description

The Whirlpool W11661107 Refrigerator Venturi is designed to enhance the circulation of air in the fridge, enhancing the cooling process. This venturi blows cold air across the refrigerator uniformly and helps in avoiding temperature changes that spoil the food and controls the flow of air to maintain the efficiency of the cooling mechanism and also saves energy and the longevity of the appliance.
Manufacturer

✓ This Product Replaces: W10110343, WPW10110343
https://www.hnkparts.com/media/catalog/product/w/1/w11661107-36849.jpg
MANUFACTURER NAME: WHIRLPOOL
PRODUCT NUMBER: W11661107
OEM PART NUMBER: W11661107
PRODUCT DESCRIPTION: VENTURI

CHOOSE THE BEST HOME APPLIANCE PARTS AND SUPPLIES FROM HNKPARTS!

  • SAME DAY SHIPPING

  • BEST QUALITY AND BEST PRICE

  • WIDE RANGE OF INVENTORY

  • BEST CUSTOMER SERVICE

HAVE MORE QUESTIONS OR NEED HELP TO PLACE THE ORDER?
REACH US AT (866)723-0907 OR [email protected]

Write Your Own Review
You're reviewing:Whirlpool W11661107 Refrigerator Venturi
Your Rating
Customer Questions
What maintenance is required for the Whirlpool W11661107 Venturi?

Regularly inspect the refrigerator venturi for blockages, dust, or debris to ensure proper airflow. Clean gently with a soft brush or cloth, and check seals for tightness. Proper maintenance prevents cooling inefficiency and ensures consistent performance. Handle carefully to avoid damaging delicate components.

What are common issues with the Whirlpool W11661107 Venturi?

  • Reduced airflow causing uneven cooling.
  • Frost buildup obstructing the venturi.
  • Loose or damaged connections affecting performance.
  • Strange noises from airflow turbulence.

Installation Steps

Step1: Unplug refrigerator and shut off water supply for safety.

Step2: Locate the venturi assembly inside the designated compartment.

Step3: Remove any screws or clips securing the old part and disconnect tubing.

Step4: Install the new venturi, reconnect tubing securely, and fasten with screws.

Step5: Check for proper alignment and tight connections.

Step6: Restore power and water, then test for correct operation and leaks.