
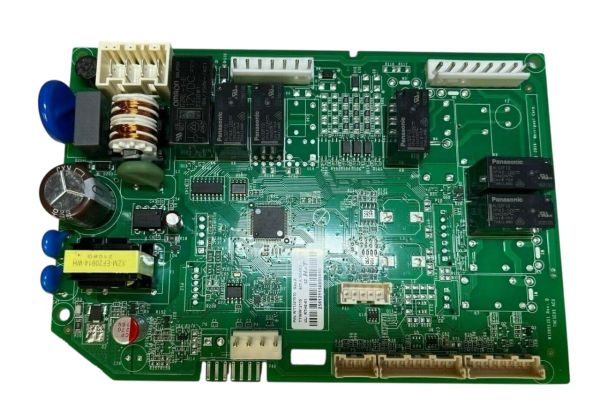
Whirlpool W11566851 Refrigerator Electronic Control Board

Special Price $197.60 Regular Price $257.84
In stock
Available Quantity:   4
SKU
W11566851

Product Description

The Whirlpool W11566851 Refrigerator Electronic Control Board designed to regulate the temperature setting and other functions such as the compressor and fan motors based on input from sensors. This information is regulated by control board to ensure that the internal environment is suitable for food preservation. It help in maintaining the energy efficiency and avoid fluctuations in the cooling cycles. The advantage of this control board is helps to prolong the life of the refrigerator by avoiding overloading of the components and enhancing the cooling efficiency.
Manufacturer

https://www.hnkparts.com/media/catalog/product/w/1/w11566851-84418.jpg
Manufacturer Name: WHIRLPOOL
Product Number: W11566851
OEM Part Number: W11566851
Product Description: Cntrl-Elec+Core

Choose the best Home Appliance parts and supplies from HnKParts!

  • Same Day Shipping

  • Best Quality And Best Price

  • Wide Range of Inventory

  • Best Customer Service

Have More Questions or Need Help to Place The Order?
Reach us at (866)723-0907 or [email protected]

Write Your Own Review
You're reviewing:Whirlpool W11566851 Refrigerator Electronic Control Board
Your Rating
Customer Questions
What maintenance is required for the Whirlpool W11566851 Electronic Control Board?

Inspect the refrigerator control board regularly for dust and moisture. Ensure all wiring connections are secure and free of corrosion. Clean gently with a dry cloth or compressed air. Always disconnect power before handling to prevent shocks or damage.

What are common issues with the Whirlpool W11566851 Electronic Control Board?

  • Control board failure due to power surges.
  • Inconsistent temperature regulation.
  • Unresponsive buttons or display malfunctions.
  • Refrigerator cycling irregularly or not cooling properly.

Installation Steps

Step1: Disconnect power at breaker and unplug refrigerator to ensure safety before starting.

Step2: Remove rear or control panel cover using proper tool carefully.

Step3: Take note of wiring connections, then carefully disconnect harnesses from old control board for reference.

Step4: Install new board aligning connectors and secure screws firmly.

Step5: Reassemble panel, restore power, and test operation carefully.