
Special Price
$6.66
Regular Price
$8.39
In stock
Available Quantity:
57
SKU
W11545539
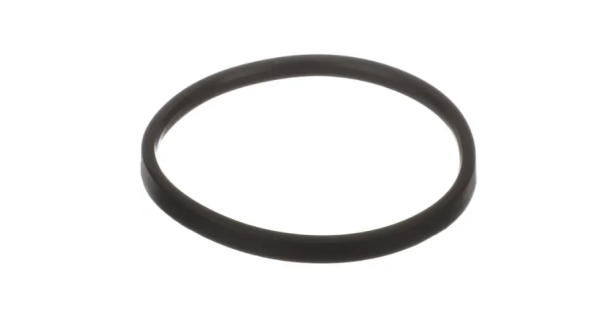
This Whirlpool W11545539 Dishwasher Gasket is responsible for ensuring that there is a tight fit between the door and the main body of the appliance to avoid any leakage during its use. It operates in such a way that the water is confined within the dishwasher when it is in use, preventing water from spraying on the floor. This gasket helps in increasing the durability of the appliance and also helps in avoiding water leakage making the appliance more efficient.
Manufacturer

✓ This Product Replaces:
W11184028
This Part Fits the Following Models (20)
KitchenAid Dishwasher KDTE204KBL0 KDTE204KBL0
KitchenAid Dishwasher KDTE204KBS0 KDTE204KBS0
KitchenAid Dishwasher KDTE204KPS0 KDTE204KPS0
KitchenAid Dishwasher KDTE204KWH0 KDTE204KWH0
KitchenAid Dishwasher KDTM604KBS0 KDTM604KBS0
KitchenAid Dishwasher KDTM604KPS0 KDTM604KPS0
KitchenAid Dishwasher KDTM404KBS0 KDTM404KBS0
KitchenAid Dishwasher KDTM404KPS0 KDTM404KPS0
KitchenAid Dishwasher KDTM804KBS0 KDTM804KBS0
KitchenAid Dishwasher KDTM804KPS0 KDTM804KPS0
Whirlpool Dishwasher WDTA50SAKB0 WDTA50SAKB0
Whirlpool Dishwasher WDTA50SAKT0 WDTA50SAKT0
Whirlpool Dishwasher WDTA50SAKV0 WDTA50SAKV0
Whirlpool Dishwasher WDTA50SAKW0 WDTA50SAKW0
Whirlpool Dishwasher WDTA50SAKZ0 WDTA50SAKZ0
Showing 1-15
of 20
| Manufacturer Name: WHIRLPOOL Product Number: W11545539 OEM Part Number: W11545539 Product Description: Gasket |
Choose the best Home Appliance parts and supplies from HnKParts!
Same Day Shipping
Best Quality And Best Price
Wide Range of Inventory
Best Customer Service
Have More Questions or Need Help to Place The Order?
Reach us at (866)723-0907 or [email protected]
Write Your Own Review
Customer Questions
Installation Steps
Step1: Disconnect dishwasher power and water supply for safety.
Step2: Remove lower rack and locate old gasket around tub or door frame.
Step3: Carefully peel out worn gasket, cleaning channel of debris or residue.
Step4: Align new gasket starting at top center and press firmly into groove.
Step5: Ensure even fit around entire perimeter with no gaps or twists.
Step6: Restore power and run short cycle to check for leaks.
